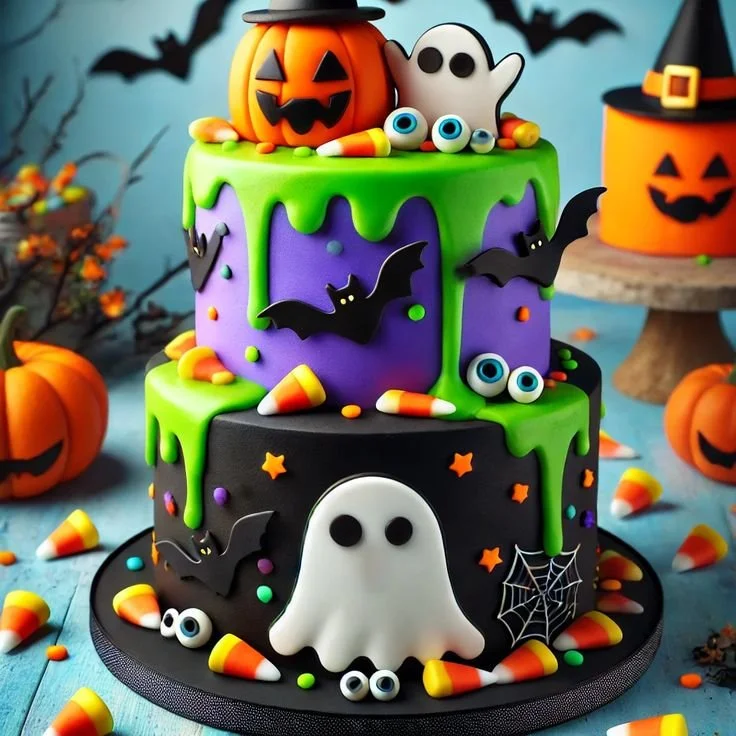
Making a colorful Halloween cake is a fun and festive way to celebrate the spooky season. This delicious cake is not only visually appealing with its vibrant layers, but it’s also incredibly simple to prepare. It’s the perfect treat for parties, family gatherings, or just a fun baking activity with the kids.
Why You’ll Love Colorful Halloween Cake
- Eye-Catching Presentation: The bright colors make this cake a showstopper at any Halloween party, sure to grab attention and bring smiles.
- Easy to Make: With straightforward steps and basic ingredients, even beginner bakers can create this delightful dessert without stress.
- Fun for Kids: Involve the little ones in the baking process! They’ll love mixing the colorful batters and decorating the cake.
- Customizable Flavors: Adjust the flavors or let your imagination run wild with decorations. You can use various frostings and toppings to create a unique cake every time.
- Perfect for Celebrations: Serve this cake at Halloween gatherings, birthdays, or any festive occasion where fun and color are welcome.
Recipe Overview
- Prep Time: 20 minutes
- Cook Time: 25-30 minutes
- Total Time: 50-60 minutes
- Servings: 8-10
- Difficulty Level: Easy
Ingredients You’ll Need for Colorful Halloween Cake
-
Dry Ingredients:
- 2 cups all-purpose flour
- 3 teaspoons baking powder
-
Wet Ingredients:
- 1 ½ cups sugar
- ½ cup unsalted butter (softened)
- 1 cup milk
- 3 large eggs
- 1 teaspoon vanilla extract
-
Coloring & Decoration:
- Food coloring (various colors for Halloween theme)
- Frosting (for decorating)
- Sprinkles (for decoration)

How to Make Colorful Halloween Cake
-
Preheat the Oven: Set your oven to 350°F (175°C). Grease and flour two round cake pans to prevent sticking.
-
Cream the Butter and Sugar: In a large mixing bowl, cream together the softened butter and sugar until the mixture is light and fluffy, about 3-5 minutes.
-
Add the Eggs and Vanilla: Beat in the eggs one at a time, ensuring each is fully incorporated before adding the next. Stir in the vanilla extract for added flavor.
-
Combine the Dry Ingredients: In a separate bowl, mix the flour and baking powder. Gradually add this dry mixture to the creamed mixture, alternating with the milk. Mix until well combined and smooth.
-
Color the Batter: Divide the batter evenly into separate bowls. Add different food coloring to each bowl to create a vibrant array of colors. Stir until well combined.
-
Fill the Pans: Pour each colored batter into the prepared cake pans, alternating colors to create a swirl or layering effect.
-
Bake the Cakes: Place the pans in the oven and bake for 25-30 minutes. A toothpick inserted in the center should come out clean when the cakes are done.
-
Cool and Frost: Allow the cakes to cool completely in the pans for about 10 minutes, then transfer them to a wire rack to cool completely before frosting. Layer the cakes with frosting between if desired, and frost the top and sides. Top with sprinkles for a festive touch.
Tips for Success
- Room Temperature Eggs: Use room temperature eggs for better emulsification in your batter, which helps in achieving a fluffier cake.
- Don’t Overmix: When combining the wet and dry ingredients, mix just until combined to avoid a dense cake.
- Check Doneness: Always check the cakes a few minutes before the minimum baking time to avoid overbaking, as ovens vary.
- Chill Your Frosting: If your frosting is too soft, chill it in the fridge for a few minutes before icing the cake to make it easier to work with.
Easy Variations
- Flavor Swaps: Experiment with different extracts like almond or lemon instead of vanilla for unique flavors.
- Layered Fillings: Add jam or whipped cream between layers for extra flavor and moisture.
- Alternative Frosting: Consider using cream cheese frosting for a tangy twist that complements the sweetness.
- Gluten-Free Option: Substitute the all-purpose flour with a gluten-free flour blend to make this cake gluten-free.
- Add-ins: Mix in mini chocolate chips or nuts for added texture and flavor.
What to Serve with Colorful Halloween Cake
- Ice Cream: Vanilla or pumpkin spice ice cream complements the sweetness of the cake perfectly.
- Hot Cocoa: A warm mug of hot cocoa pairs nicely with the colorful layers for a cozy dessert experience.
- Fruit Salad: A refreshing fruit salad balances the sweetness and adds a touch of healthy goodness to the meal.
- Spooky Snacks: Serve with spooky-shaped cookies or Halloween-themed treats to create a festive dessert table.
- Coffee or Tea: A warm cup of coffee or spiced tea works well, providing a great contrast to the sweetness of the cake.
Storage and Reheating
- Refrigerator Storage: Store any leftover cake in an airtight container in the refrigerator for up to 4 days.
- Freezer Storage: The un-frosted cake layers can be frozen for up to 3 months. Wrap each layer tightly in plastic wrap and then in aluminum foil.
- Reheating: If you prefer to enjoy the cake warm, heat individual slices in the microwave for about 10-15 seconds.
- Preserving Texture: To maintain moisture, do not frost the cake until you are ready to serve, if storing in the refrigerator.
Common Mistakes to Avoid
- Not Prepping the Pans: Failing to grease and flour the pans can lead to cakes that stick and break when trying to remove them.
- Skipping the Cooling Step: Frosting warm cakes can lead to melting frosting and a messy presentation. Always let the cakes cool completely.
- Underbaking or Overbaking: Keep an eye on your cakes while they bake. It’s easy to overbake due to variations in oven temperatures.
- Incorrect Measurements: Ensure accurate measurements for all ingredients to achieve the right texture and flavor.
Colorful Halloween Cake: Background & Cultural Inspiration
This colorful Halloween cake embodies the spirit of celebrating traditions centered around Halloween, a time for creativity in both decor and food. The use of vibrant colors echoes themes of festivity and whimsy associated with the holiday. Layered cakes have long been popular for special occasions, symbolizing joy and gathering. The playful aspect of using food coloring makes this cake particularly suitable for Halloween, allowing for endless creativity that engages both bakers and guests.
Frequently Asked Questions
Can I use different colors for the cake?
Absolutely! You can choose any colors that fit your theme or personal preference. Just remember to use food-safe coloring and mix each thoroughly for an even color.
How should I store the cake if I have leftover slices?
Store leftover slices in an airtight container in the refrigerator for up to four days. You can also freeze individual slices for up to three months.
Can I make this cake in advance?
Yes, you can make the cake layers in advance and freeze them. Just ensure they are well wrapped to preserve freshness.
Can I make this cake dairy-free?
Yes, you can use dairy-free butter and milk alternatives like almond or coconut milk to create a dairy-free version of this cake.
What’s the best way to decorate the cake?
Use a simple buttercream or cream cheese frosting, and get creative with sprinkles, candy corn, or other Halloween-themed decorations for a festive look.
Final Thoughts
Try your hand at this colorful Halloween cake for a delightful and fun baking experience. Its vibrant layers and simple preparation make it ideal for celebrations, ensuring everyone will love this treat. Whether you’re hosting a party or looking for a creative baking project, this cake will be a memorable centerpiece. So gather your ingredients, don your apron, and enjoy creating this festive dessert!