
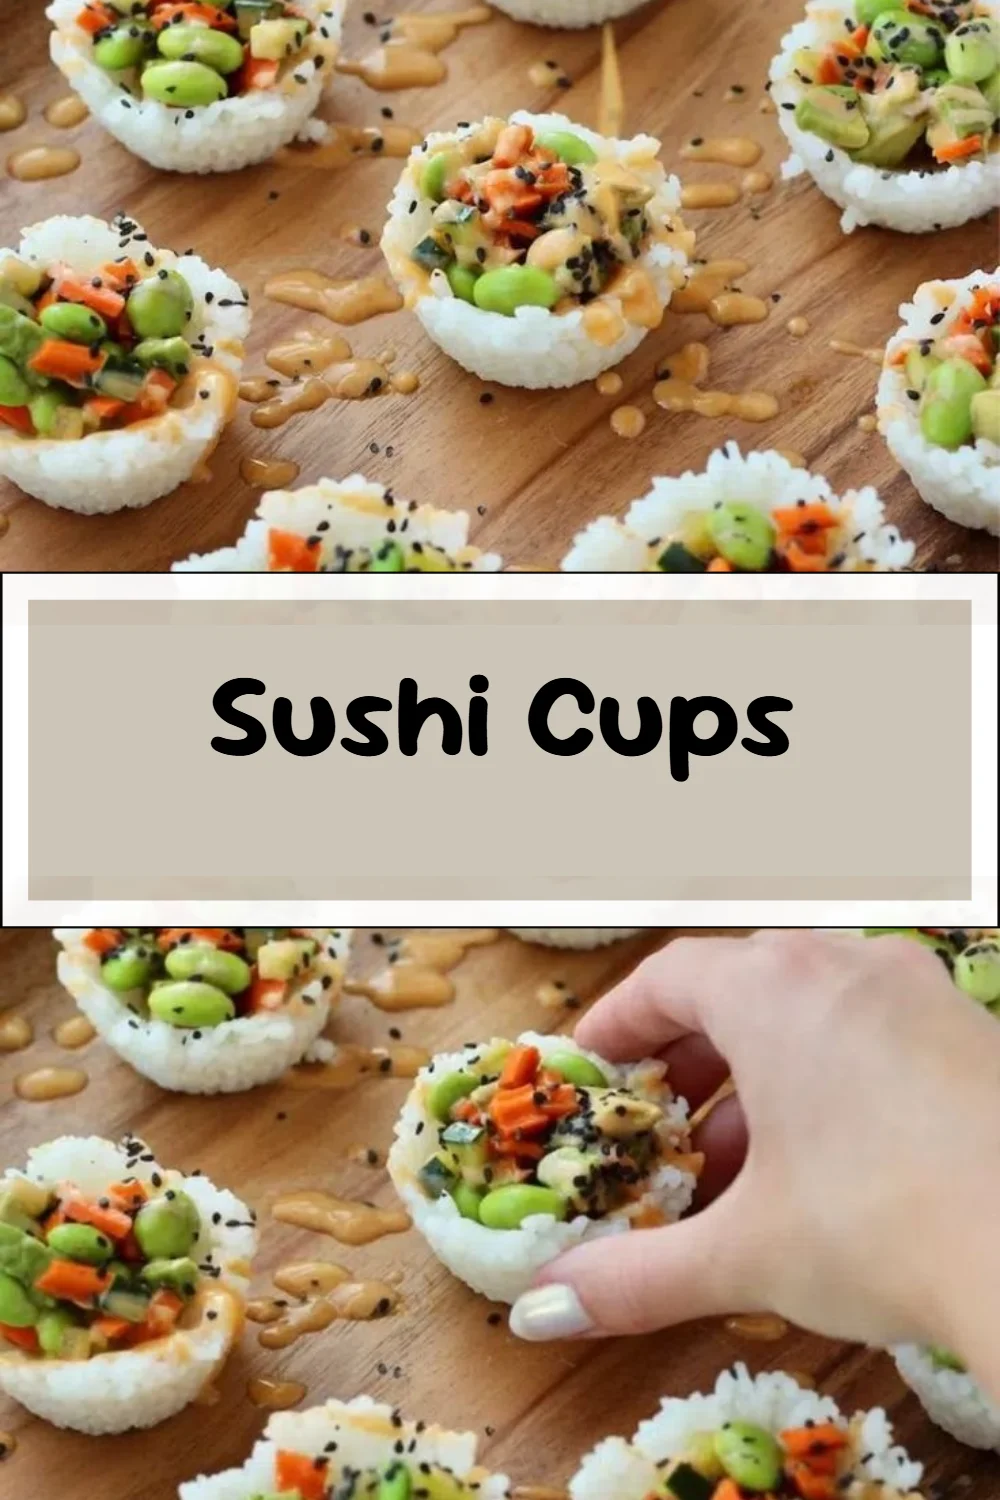
Sushi Cups are a delightful and creative twist on traditional sushi. These easy-to-make bite-sized treats bring the essence of sushi right to your kitchen without the need for intricate rolling techniques. Perfect for parties, meal prep, or a cozy dinner, they are customizable and packed with fresh flavors.
Why You’ll Love Sushi Cups
- Simple Preparation: Sushi Cups are incredibly easy to make, even for beginners. The step-by-step instructions ensure that anyone can whip up this dish without any fuss.
- Customizable Fillings: You can choose your favorite vegetables and proteins, making this recipe adaptable for various preferences or dietary restrictions.
- Perfect for Meal Prep: These sushi cups are ideal for preparing ahead of time, allowing for quick lunches or snacks throughout the week.
- Fun Presentation: The muffin tin shape makes for an eye-catching presentation, perfect for entertaining or impressing family.
- Fresh and Flavorful: With a combination of fresh veggies, creamy avocado, and a zesty sauce, each bite is packed with flavor and nutrition.
Recipe Overview
- Prep Time: 25 minutes
- Cook Time: 20 minutes
- Total Time: 45 minutes
- Servings: 12 cups
- Difficulty Level: Easy
Ingredients You’ll Need for Sushi Cups
-
For the Sushi Rice:
- 1 cup sushi rice, rinsed
- 1 1/2 cups water
-
For the Filling:
- 1/2 cup finely chopped veggies of your choice (cucumbers, bell peppers, carrots work well)
- 1/4 cup steamed mukimame (shelled edamame)
- 1/4 cup diced avocado (about half a small avocado)
-
For the Sauce:
- 1 tablespoon sauce of your choice (soy sauce, tamari, or coconut aminos)
- 1/4 cup mayonnaise
- 1 teaspoon Sriracha sauce (adjust to taste)
- 1 teaspoon coconut aminos or soy sauce
- 1 teaspoon honey
- 1/2 teaspoon sesame oil
-
For Garnish:
- Black sesame seeds

How to Make Sushi Cups
-
Cook the Rice:
In a medium pot, combine the rinsed sushi rice and water. Bring it to a boil over high heat, then reduce the heat to low, cover the pot, and simmer for 20 minutes or until the rice is tender and the water is absorbed. Once finished, remove from heat and let cool slightly. -
Form the Rice Cups:
Press about 2 heaping tablespoons of the cooked rice into each cup of a greased muffin tin. Compact the rice well to form solid cups. Place the muffin tin in the refrigerator to chill for 20 minutes, allowing the rice to set firmly. -
Prepare the Filling:
In a mixing bowl, combine your chopped veggies, steamed mukimame, and diced avocado. Stir in the coconut aminos or soy sauce to blend the flavors evenly. -
Make the Sauce:
In a separate bowl, whisk together the mayonnaise, Sriracha sauce, coconut aminos (or soy sauce), honey, and sesame oil. Adjust the Sriracha to your desired spice level. -
Assemble the Sushi Cups:
Remove the rice cups from the fridge. Spoon a generous tablespoon of the veggie filling over each rice cup, then drizzle the spicy mayonnaise over the top. Finish with a sprinkle of black sesame seeds for garnish.
Tips for Success
- Rinse the Rice: Rinsing sushi rice is crucial for removing excess starch, which can make the rice gummy. This step helps achieve the perfect texture.
- Adjust Spice Levels: If you’re not keen on heat, start with a smaller amount of Sriracha in the sauce, and taste as you go.
- Chill Time is Key: Allowing the rice to chill in the muffin tin helps it hold its shape better when you remove it.
- Use Your Favorite Veggies: Get creative with your fillings; various textures like crunchy cucumbers and soft avocado complement each other beautifully.
- Watch Cook Time: Not all stoves are the same. Keep an eye on the rice to avoid overcooking, which can lead to mushiness.
Easy Variations
- Protein Boost: Add cooked crab meat, shrimp, or grilled chicken to the filling for a protein-rich option.
- Dairy-Free Option: Substitute the mayonnaise with a vegan alternative or use avocado as the creamy component.
- Spice It Up: Incorporate diced jalapeño or sliced radishes for an extra kick.
- Different Grain: Swap sushi rice for quinoa or brown rice for a healthier twist.
- Serve with Nori: Add a small piece of nori (seaweed) alongside for a traditional sushi flavor experience.
What to Serve with Sushi Cups
- Soy Sauce: A simple dipping sauce is perfect for enhancing the flavors of the sushi cups.
- Pickled Ginger: This crispy, tangy condiment complements sushi and adds a burst of flavor.
- Wasabi: For those who enjoy spice, a side of wasabi offers a pungent kick.
- Seaweed Salad: The fresh taste of seaweed salad pairs nicely with sushi, adding a refreshing touch.
- Miso Soup: This comforting soup makes a great starter and balances the meal.
Storage and Reheating
- Refrigerator Storage: Store the sushi cups in an airtight container in the fridge for up to 2 days.
- Freezer Storage: While best eaten fresh, if you have leftovers, they can be frozen for up to 1 month. To freeze, store in a single layer in a freezer-safe bag.
- Reheating: For best results, use the microwave to gently warm the sushi cups. Remove the filling first to avoid sogginess. Reheat without the sauce to maintain texture.
- Meal Prep Note: You can prepare the rice and filling ahead of time and assemble just before serving for optimal freshness.
Common Mistakes to Avoid
- Not Rinsing the Rice: Skipping this step can lead to gummy rice, which makes shaping the cups difficult.
- Overpacking the Muffin Tin: Pressing the rice too hard can make the cups dense. A gentle touch is key.
- Skipping Chill Time: Immediately serving the cups without chilling can result in them falling apart.
- Ingredient Overload: Avoid over-filling the sushi cups; stick to the recommended amounts for the best ratio of rice to filling.
- Ignoring Sauce Balance: Adjust the sauce to your taste preferences; finding the right balance enhances the overall flavor.
Sushi Cups: Background & Cultural Inspiration
Sushi Cups draw from the rich tradition of Japanese sushi but offer a modern flare that makes them accessible to everyone. The concept of sushi itself has evolved over centuries, transitioning from a method of preserving fish to the colorful and diverse rolls we enjoy today. By using a muffin tin to create these cups, the recipe simplifies the often-complex process of sushi-making into fun and easily enjoyed bites. These cups allow for personalization, making it possible to cater to different palates while celebrating fresh, wholesome ingredients and flavors inspired by traditional Japanese cuisine.
Frequently Asked Questions
Can I use regular rice instead of sushi rice?
While you can, using sushi or short-grain rice yields the sticky consistency needed to hold the cups together.
How long can I store the sushi cups?
They will stay fresh in the refrigerator for about 2 days. For longer storage, freeze them for up to 1 month.
Can I prepare these cups ahead of time?
Yes! You can prepare the rice and filling a day ahead and assemble just before serving for the best texture.
How can I adjust the spice level?
If you prefer milder flavors, reduce the amount of Sriracha in the mayo or omit it altogether, adjusting with other flavor elements like soy sauce.
What other vegetables work well in the filling?
Feel free to use any fresh vegetables you like—carrots, radishes, or any crunchy veggies make great additions.
Final Thoughts
Sushi Cups are not only a delicious dish but also a wonderful way to explore the flavors of sushi in an approachable format. Perfect for meal prep, entertaining, or satisfying a sushi craving, these little gems are sure to impress. With their customizable nature and easy preparation, why not try making them today? You’ll love the fresh ingredients and vibrant flavors that come together in this delightful recipe.
Sushi Cups

Sushi Cups are a delightful twist on traditional sushi, featuring easy-to-make bite-sized treats filled with fresh veggies, creamy avocado, and zesty sauce. Perfect for parties or meal prep!
For the Sushi Rice
- 1 cup sushi rice, rinsed (Rinsing is crucial for removing excess starch.)
- 1.5 cups water
For the Filling
- 0.5 cup finely chopped veggies of your choice (cucumbers, bell peppers, carrots work well) (Feel free to get creative with your veggie choices.)
- 0.25 cup steamed mukimame (shelled edamame)
- 0.25 cup diced avocado (about half a small avocado)
For the Sauce
- 1 tablespoon sauce of your choice (soy sauce, tamari, or coconut aminos)
- 0.25 cup mayonnaise (Can be substituted with a vegan alternative.)
- 1 teaspoon Sriracha sauce (adjust to taste) (Adjust spice level based on preference.)
- 1 teaspoon coconut aminos or soy sauce
- 1 teaspoon honey
- 0.5 teaspoon sesame oil
For Garnish
- black sesame seeds
Cook the Rice
- In a medium pot, combine the rinsed sushi rice and water. Bring it to a boil over high heat, then reduce the heat to low, cover the pot, and simmer for 20 minutes or until the rice is tender and the water is absorbed. Remove from heat and let cool slightly.
Form the Rice Cups
- Press about 2 heaping tablespoons of the cooked rice into each cup of a greased muffin tin, compacting the rice well. Place the muffin tin in the refrigerator to chill for 20 minutes.
Prepare the Filling
- In a mixing bowl, combine your chopped veggies, steamed mukimame, and diced avocado. Stir in coconut aminos or soy sauce to blend the flavors.
Make the Sauce
- In a separate bowl, whisk together the mayonnaise, Sriracha sauce, coconut aminos (or soy sauce), honey, and sesame oil.
Assemble the Sushi Cups
- Remove the rice cups from the fridge. Spoon a generous tablespoon of the veggie filling over each rice cup, then drizzle the spicy mayonnaise over the top. Finish with a sprinkle of black sesame seeds for garnish.
Rinse the rice thoroughly to remove excess starch, adjust spice levels to taste, and allow chilling time for best results. You can prepare the rice and filling ahead of time and assemble just before serving for optimal freshness.