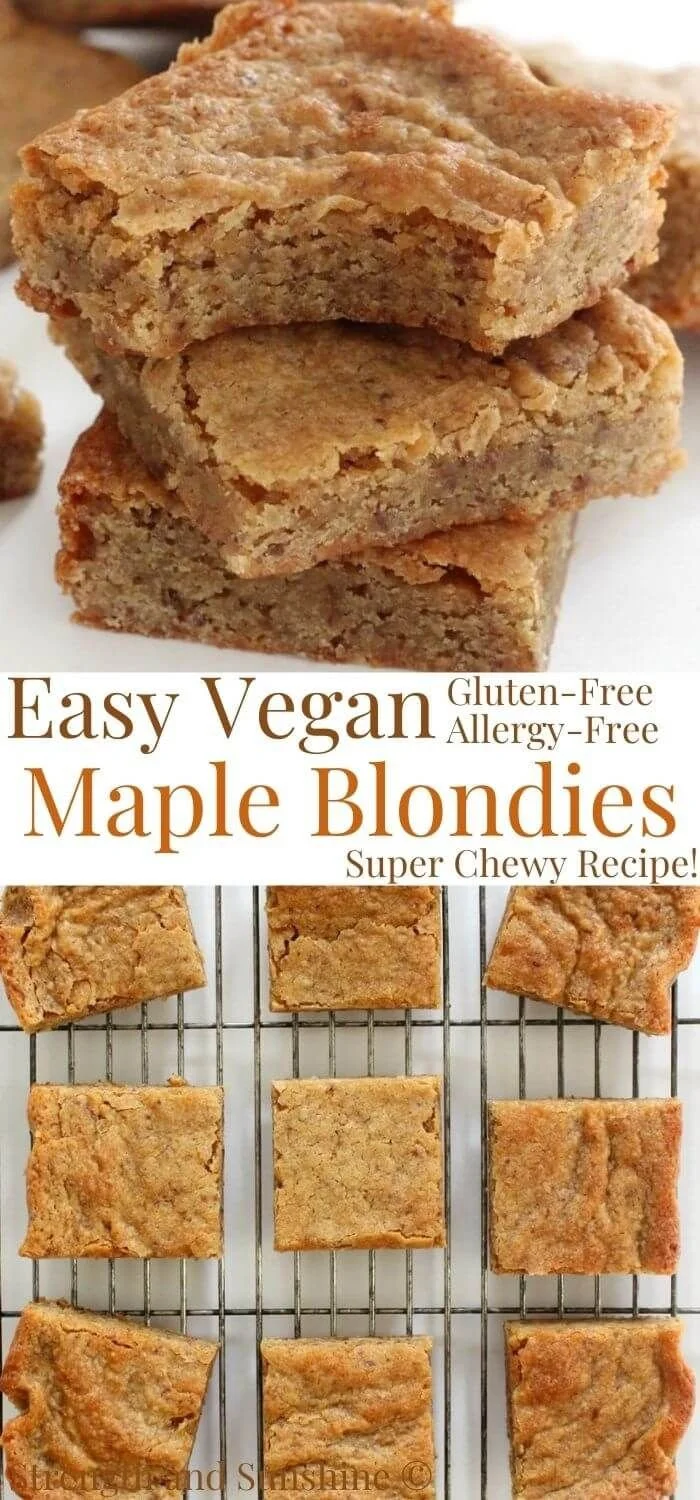
Making Gluten-Free Maple Blondies (Vegan, Allergy-Free) is a delightful way to satisfy your sweet tooth without the worry of gluten or common allergens. These blondies are not only easy to prepare but also bursting with flavor, making them perfect for snack time or dessert.
Why You’ll Love Gluten-Free Maple Blondies
- Quick to Make: You’ll have these blondies ready in no time, making them ideal for last-minute cravings or gatherings.
- Easy Ingredients: With simple, wholesome ingredients, you can whip these up even if you’re new to baking.
- Allergy-Friendly: Suitable for gluten-free and vegan diets, these blondies can be enjoyed by many without compromising on flavor.
- Sweetened Naturally: Using maple syrup provides a rich sweetness and depth of flavor without refined sugars.
- Versatile Enjoyment: They make a great grab-and-go snack or a comforting dessert paired with your favorite ice cream.
Recipe Overview
- Prep Time: 10 minutes
- Cook Time: 20-25 minutes
- Total Time: 30-35 minutes
- Servings: 16 blondies
- Difficulty Level: Easy
Ingredients You’ll Need for Gluten-Free Maple Blondies
-
Dry Ingredients:
- 1 cup almond flour
- 1/2 cup coconut flour
- 1/4 cup brown sugar
- 1/2 teaspoon baking soda
- 1/4 teaspoon salt
-
Wet Ingredients:
- 1/2 cup maple syrup
- 1/4 cup coconut oil, melted
- 1 teaspoon vanilla extract
These ingredients come together to create a moist, chewy texture with a hint of nuttiness. If you’re looking for substitutions, you could replace almond flour with an equal amount of oat flour for a different flavor. Be mindful that coconut flour is very absorbent, so it is crucial to stick to the measurements provided.
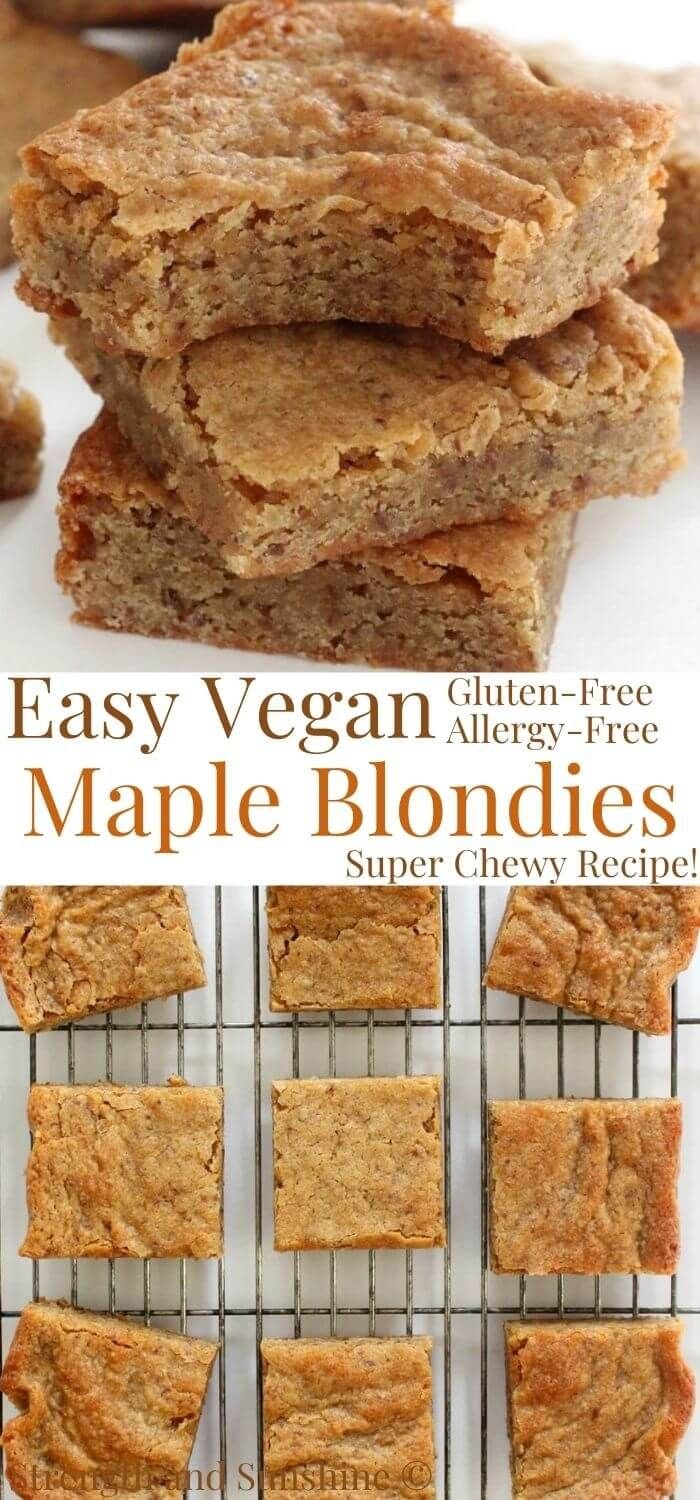
How to Make Gluten-Free Maple Blondies
- Preheat the Oven: Heat your oven to 350°F (175°C) and line an 8×8-inch baking pan with parchment paper. This ensures easy removal and cleaning afterward.
- Mix Dry Ingredients: In a large bowl, combine almond flour, coconut flour, brown sugar, baking soda, and salt. Stir these dry ingredients well to distribute evenly.
- Combine Wet Ingredients: In another bowl, whisk together the maple syrup, melted coconut oil, and vanilla extract until smooth. This mixture should be well-blended to ensure a consistent flavor.
- Combine Mixtures: Pour the wet mixture into the bowl with the dry ingredients. Stir until everything is thoroughly combined, and no dry flour remains.
- Prepare for Baking: Pour the batter into your prepared baking pan. Spread it evenly with a spatula, leveling the top for uniform baking.
- Bake: Place in the preheated oven and bake for 20-25 minutes. You’ll know they are done when the edges turn golden brown, and a toothpick inserted in the center comes out clean.
- Cool and Cut: Allow to cool in the pan for about 10 minutes before transferring to a wire rack. Once fully cooled, cut into squares.
Tips for Success
- Don’t Overmix: Once your wet and dry ingredients are combined, mix just until they come together to keep the blondies tender.
- Check Doneness: Ovens can vary; start checking your blondies at the 20-minute mark to avoid overbaking.
- Let Them Cool: Cooling allows the blondies to set and enhances their flavor. Resist the urge to dig in too soon!
- Adjust Sweetness: If you prefer less sweetness, reduce the maple syrup slightly or add a pinch of cinnamon to balance flavors.
Easy Variations
- Add Nuts: Fold in chopped walnuts or pecans for added crunch and flavor.
- Chocolate Drizzle: Drizzle melted dairy-free chocolate on top once cooled for an indulgent touch.
- Fruity Twist: Add in shredded coconut, or mix in dried cranberries for a fruity flavor boost.
- Spiced Blondies: Incorporate spices like cinnamon or cardamom to introduce warmth.
What to Serve with Gluten-Free Maple Blondies (Vegan, Allergy-Free)
- Coconut Ice Cream: The creaminess of coconut ice cream complements the chewy texture of the blondies perfectly.
- Fruit Salad: A refreshing fruit salad on the side adds brightness and balances the sweetness of the blondies.
- Coffee or Tea: Serve alongside a warm cup of coffee or herbal tea for an enjoyable afternoon pairing.
- Nut Butter: A smear of almond or peanut butter on top creates an extra layer of flavor and richness.
Storage and Reheating
- Refrigerator: Store leftovers in an airtight container in the fridge for up to one week. The blondies will stay fresh and maintain their texture.
- Freezer: They freeze well! Wrap individual portions in plastic wrap and place them in a freezer-safe bag. Enjoy up to three months later; just thaw at room temperature.
- Reheating: For a warm treat, microwave a blondie for 10-15 seconds on low power. This will melt the edges slightly and enhance the flavors.
Common Mistakes to Avoid
- Incorrect Flour Measurement: Use the spoon-and-level method to measure flour to avoid a dry final product.
- Overbaking: Keep a close eye on the blondies as they finish baking; overbaking can lead to a dry texture.
- Skipping the Parchment: Always line your pan to make removal and cleanup easier; skipping this step may result in stuck blondies.
Gluten-Free Maple Blondies (Vegan, Allergy-Free): Background & Cultural Inspiration
Blondies are a delightful variation on traditional brownies, characterized by their light color and unique caramel and vanilla flavors. This version, made gluten-free and vegan, caters to modern dietary needs without sacrificing taste. The use of maple syrup not only sweetens but also brings a distinct depth to these treats that harks back to the natural sweetness found in many traditional desserts. Enjoying blondies can be a comforting reminder of homemade treats, and they bring a touch of nostalgia to gatherings and snacks.
Frequently Asked Questions
Can I use regular flour instead of gluten-free options?
To maintain the gluten-free integrity of the recipe, stick with almond flour and coconut flour.
What can I use instead of maple syrup?
Agave nectar or honey (if not vegan) can be used as substitutes, but they will alter the flavor slightly.
Can I make these blondies in advance?
Absolutely! They store well in the fridge or freezer, making them a great make-ahead treat for events.
How do I know when they are done baking?
Check for golden edges and insert a toothpick into the center; it should come out clean or with a few moist crumbs.
Can I double the recipe for a larger batch?
Yes, you can easily double this recipe and bake it in a 9×13-inch pan. Just be sure to adjust baking time as needed.
Final Thoughts
Gluten-Free Maple Blondies (Vegan, Allergy-Free) are an excellent addition to any dessert lineup, providing a deliciously sweet treat suitable for most diets. Their combination of easy-to-find ingredients and straightforward preparation makes them perfect for bakers of all levels. Try these blondies today, and experience the perfect blend of chewy and sweet for yourself!
PrintGluten-Free Maple Blondies (Vegan, Allergy-Free)
Delicious gluten-free and vegan blondies, sweetened with maple syrup for a rich flavor, perfect for dessert or snack.
- Prep Time: 10 minutes
- Cook Time: 25 minutes
- Total Time: 35 minutes
- Yield: 16 blondies
- Category: Dessert
- Method: Baking
- Cuisine: American
- Diet: Gluten-Free, Vegan
Ingredients
- 1 cup almond flour
- 1/2 cup coconut flour
- 1/4 cup brown sugar
- 1/2 teaspoon baking soda
- 1/4 teaspoon salt
- 1/2 cup maple syrup
- 1/4 cup coconut oil, melted
- 1 teaspoon vanilla extract
Instructions
- Preheat the oven: Heat your oven to 350°F (175°C) and line an 8×8-inch baking pan with parchment paper.
- Mix dry ingredients: In a large bowl, combine almond flour, coconut flour, brown sugar, baking soda, and salt.
- Combine wet ingredients: In another bowl, whisk together the maple syrup, melted coconut oil, and vanilla extract until smooth.
- Combine mixtures: Pour the wet mixture into the bowl with the dry ingredients. Stir until thoroughly combined.
- Prepare for baking: Pour the batter into your prepared baking pan and spread evenly.
- Bake: Place in the preheated oven and bake for 20-25 minutes.
- Cool and cut: Allow to cool in the pan for about 10 minutes before transferring to a wire rack and cutting into squares.
Notes
Don’t overmix the batter and check for doneness to avoid overbaking.