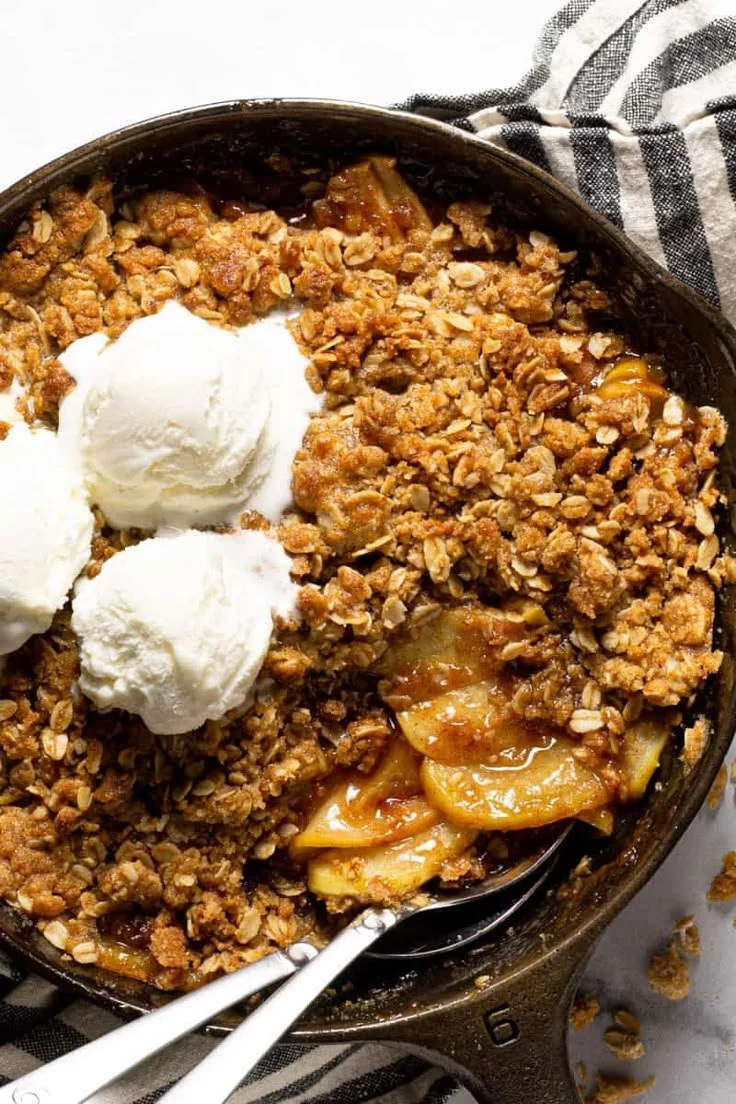
Apple Crisp is a classic dessert that perfectly combines sweet, tender apples with a crunchy, buttery topping. This comforting dish is not only easy to make but also allows the natural flavors of the fruit to shine through. If you’re looking for a simple yet delicious dessert to impress your family or guests, this Easy Homemade Apple Crisp is a must-try!
Why You’ll Love Easy Homemade Apple Crisp
- Simple Ingredients: With just a handful of pantry staples, you can create this delightful dessert. It’s a great way to use up those Honeycrisp apples!
- Quick to Prepare: This recipe doesn’t require advanced baking skills. It comes together in no time, making it perfect for busy weeknights or last-minute gatherings.
- Versatile Flavor: You can adjust the sweetness and spice level to your preference, whether you like a little kick from cinnamon or prefer a milder taste.
- Comforting Dessert: The warm, gooey apples paired with a crunchy topping evoke feelings of home and nostalgia, making it a family favorite.
- Serve with Ice Cream: The combination of warm apple crisp with a scoop of vanilla ice cream is pure bliss, garnering raves from everyone who tries it.
Recipe Overview
- Prep Time: 15 minutes
- Cook Time: 30-35 minutes
- Total Time: 50 minutes
- Servings: 6
- Difficulty Level: Easy
Ingredients You’ll Need for Easy Homemade Apple Crisp
-
For the Filling:
- 4 Honeycrisp apples, peeled, cored, and sliced
- 1/2 cup brown sugar
- 1 tablespoon ground cinnamon
- 1/2 teaspoon ground nutmeg (optional)
-
For the Crumb Topping:
- 1 cup all-purpose flour
- 1 cup rolled oats
- 1/2 cup brown sugar
- 1/2 teaspoon ground cinnamon
- 1/2 cup butter, melted
- Optional: 1/2 cup chopped walnuts or pecans for extra crunch
For best results, choose Honeycrisp apples for their perfect balance of sweetness and tartness. If you don’t have them on hand, Granny Smith or Fuji apples are good substitutes.

here
How to Make Easy Homemade Apple Crisp
-
Preheat the Oven
Preheat your oven to 350°F (175°C). This ensures even baking for the apple crisp. -
Prepare the Apple Filling
In a large mixing bowl, combine the sliced Honeycrisp apples, brown sugar, cinnamon, and nutmeg (if using). Toss until the apples are well-coated. -
Make the Crumb Topping
In another bowl, combine the flour, rolled oats, brown sugar, and cinnamon. Pour in the melted butter and mix until the mixture is crumbly. You can use your hands to achieve the desired texture. -
Assemble the Crisp
Spread the apple mixture evenly in a greased baking dish. Then, layer the crumbly topping generously over the apples. -
Bake
Place the baking dish in the preheated oven and bake for 30-35 minutes, or until the topping is golden brown and the apples are bubbly. -
Serve
Let the apple crisp cool for a few minutes before serving. Serve warm, topped with a generous scoop of vanilla ice cream.
Tips for Success
- Choose the Right Apples: Using a mix of sweet and tart apples can add depth to the flavor.
- Don’t Overwork the Topping: Mix until just combined. Overmixing can lead to a dense topping instead of a light, crumbly one.
- Monitor Baking Time: Ovens can vary. Keep an eye on the crisp as it bakes, and remove it when the topping is golden brown.
- Add Texture: For added crunch, consider sprinkling chopped nuts into the crumb topping.
- Chill Apples if Needed: If your apples are overly juicy, consider chilling them for a few minutes after slicing to prevent excess liquid in your filling.
Easy Variations
- Berry Apple Crisp: Add a cup of fresh or frozen berries like blueberries or raspberries for a fruity twist.
- Coconut Crisp: Substitute half of the flour with shredded coconut for a tropical flavor.
- Sugar-Free Option: Use a sugar substitute in place of brown sugar for a lighter version that still tastes delicious.
- Spiced Up Topping: Incorporate a pinch of ginger or allspice into the topping for a warmer flavor profile.
- Peach Apple Crisp: Mix in slices of fresh peaches for a sweet, summery variation.
What to Serve with Easy Homemade Apple Crisp
- Vanilla Ice Cream: A traditional pairing that enhances the warm flavors of the crisp.
- Whipped Cream: Light and fluffy, it adds a creamy texture that complements the dessert perfectly.
- Caramel Sauce: Drizzle over the top for an indulgent touch that caramel lovers will adore.
- Coffee or Tea: A warm beverage pairs nicely, balancing the sweetness of the dessert.
- Yogurt: Serve with a dollop of plain or Greek yogurt for a tangy contrast.
Storage and Reheating
- Refrigerator Storage: Store any leftovers in an airtight container in the refrigerator for up to 3 days.
- Freezer Storage: You can freeze the unbaked crisp for up to 2 months. Just bake it straight from the freezer, adding an extra 10 minutes to the baking time.
- Reheating: To reheat, place in a 350°F (175°C) oven for about 10-15 minutes until warmed through. To maintain the topping’s crispiness, cover with foil for the first half of reheating.
- Meal Prep Note: You can prepare the filling and topping in advance, then assemble and bake as needed for a freshly baked dessert.
Common Mistakes to Avoid
- Using Too Many Juicy Apples: Avoid overly juicy apples, which can result in a watery filling. Stick to firmer varieties for the best results.
- Skipping the Resting Period: Allow the crisp to cool slightly before serving. This helps the filling set, making it easier to serve.
- Overbaking: Keep an eye on the crisp towards the end of the baking time to prevent burning the topping.
- Not Greasing the Dish: Make sure to grease your baking dish to prevent sticking when serving.
- Ignoring the Topping Ratio: Ensure you have a balanced ratio of topping to fruit for a harmonious texture and flavor.
Easy Homemade Apple Crisp: Background & Cultural Inspiration
Apple crisp, also known as apple crumble, has its roots in colonial America, where apples were abundant. It offered a way to use seasonal fruit and create a comforting dessert with minimal ingredients. Typically enjoyed during fall and winter, apple crisp brings back memories of family gatherings and comforting home-cooked meals. Its simplicity, versatility, and ability to warm the soul reflect the essence of comfort food in American cuisine.
Frequently Asked Questions
Can I use other types of apples?
Yes, you can! While Honeycrisp apples are ideal, any combination of sweet and tart apples like Granny Smith or Fuji will work well.
Can I make this ahead of time?
Absolutely! You can prepare the filling and crumb topping ahead of time and store them separately in the refrigerator. Just assemble and bake when you’re ready to serve.
How do I store the leftovers?
Store leftover apple crisp in an airtight container in the refrigerator for up to 3 days. Reheat in the oven for best results.
Can I make a gluten-free version?
Yes! Substitute all-purpose flour with a gluten-free flour blend and make sure your oats are certified gluten-free.
How can I make the topping extra crunchy?
Consider adding chopped nuts like walnuts or pecans to the crumb topping for added crunch and flavor.
Final Thoughts
Easy Homemade Apple Crisp is a delightful dessert that brings warmth and comfort, perfect for sharing with family and friends. With simple ingredients and straightforward steps, it’s easy enough for beginner cooks to master. Don’t hesitate to try this recipe and elevate your dessert game; the delicious combination of warm apples and crunchy topping is simply irresistible!