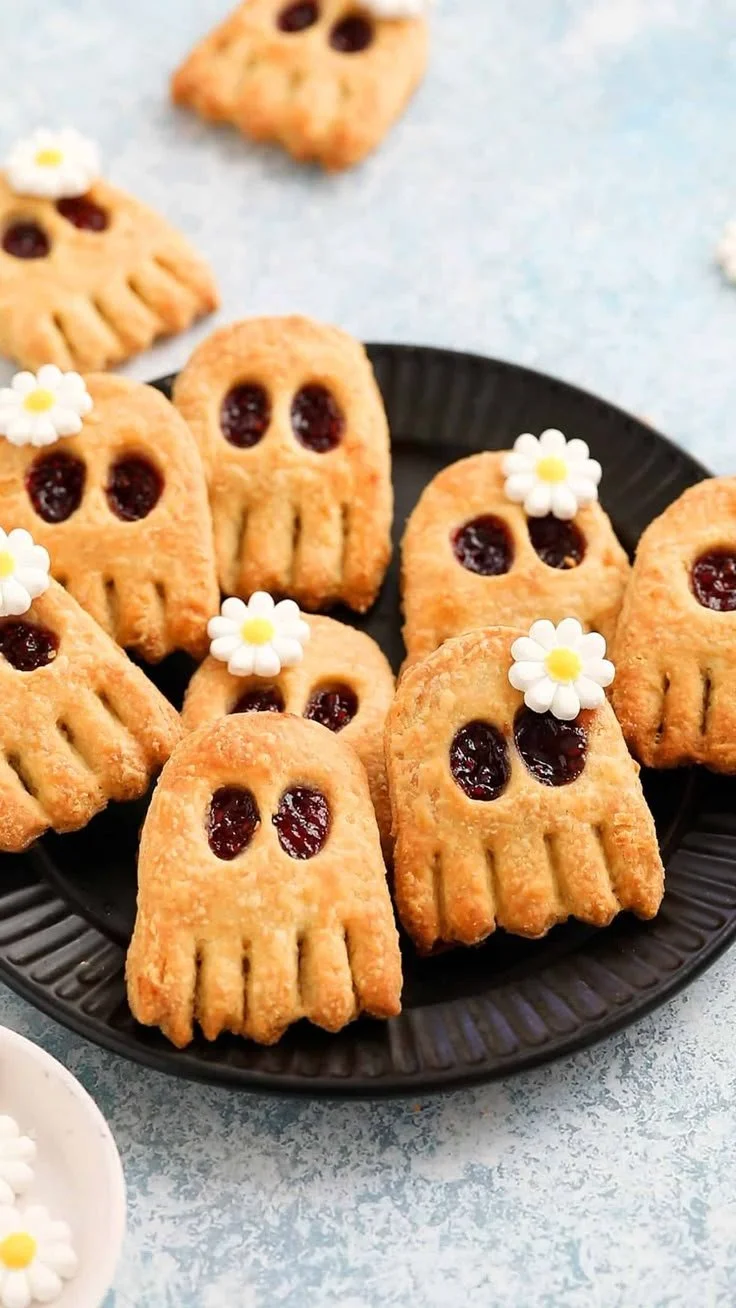
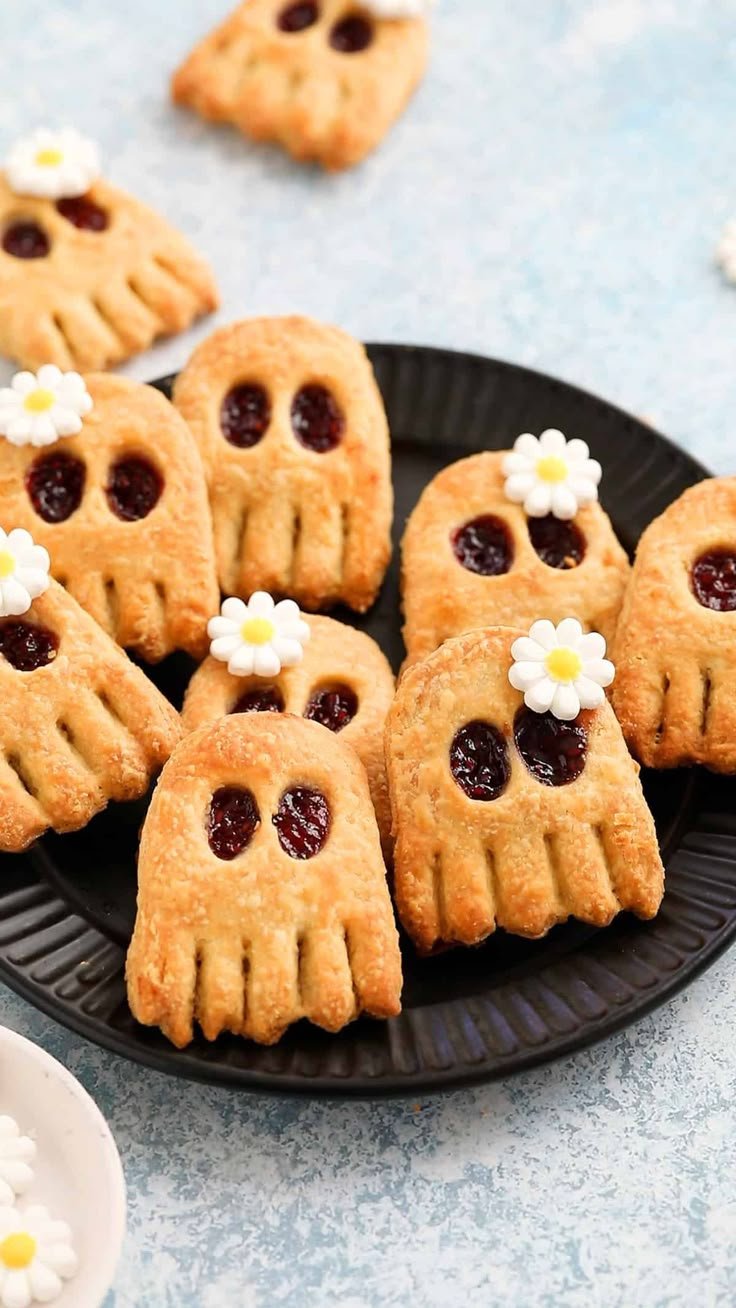
The Halloween Pop Tarts recipe is a delightful treat that combines the fun of nostalgia with the festive spirit of Halloween. Perfect for kids and adults alike, these homemade pastries filled with raspberry jam bring a burst of flavor and creativity to your seasonal festivities. With simple ingredients and easy steps, you’ll want to make these adorable Pop Tarts a staple for your Halloween celebrations.
Why You’ll Love Halloween Pop Tarts
- Creative Fun: These pastries are not just delicious; they’re a canvas for your creativity. You can decorate them with icing and sprinkles to create spooky designs.
- Easy to Make: With a few simple ingredients and straightforward steps, even beginner bakers can whip these up without any hassle.
- Perfect for Any Occasion: While they are themed for Halloween, these Pop Tarts can be enjoyed anytime, making them a versatile addition to your recipe collection.
- Family-Friendly Treat: Kids love helping in the kitchen, and these Pop Tarts are a great way to get them involved in baking while letting their imaginations run wild.
- Customize with Fillings: The recipe is a base that allows for different jams or even chocolate fillings, catering to varying tastes and preferences.
- Great for Meal Prep: You can make a batch ahead of time and enjoy them as a quick breakfast or snack throughout the week.
Recipe Overview
- Prep Time: 20 minutes
- Cook Time: 25 minutes
- Total Time: 45 minutes
- Servings: 8 Pop Tarts
- Difficulty Level: Easy
Ingredients You’ll Need for Halloween Pop Tarts
- 1 package of pie crusts (store-bought or homemade)
- 1 cup raspberry jam (or your favorite fruit jam)
- 1 egg (for egg wash)
- Sprinkles (optional, for decoration)
- Food coloring (optional, for icing decoration)
How to Make Halloween Pop Tarts
-
Preheat the Oven
- Preheat your oven to 350°F (175°C) to ensure it’s hot enough for baking.
-
Roll Out the Pie Crusts
- On a floured surface, carefully roll out the pie crusts until they’re about 1/8 inch thick. This will create a nice flaky texture.
-
Cut Into Rectangles
- Use a sharp knife or a pizza cutter to cut the rolled-out dough into rectangles about 3×5 inches. These will form the tops and bottoms of your Pop Tarts.
-
Add the Jam
- Place about a tablespoon of raspberry jam in the center of half of the rectangles. Be careful not to overfill, as this can cause leakage when baking.
-
Seal with Another Rectangle
- Take the remaining rectangles and place them on top of the jam-filled pieces. Gently press the edges to seal. Use a fork to crimp the edges for a decorative touch and to ensure they’re well sealed.
-
Egg Wash
- Beat the egg and brush it over the tops of the Pop Tarts. This will give a beautiful golden color when baked. If desired, sprinkle with sugar or decorative sprinkles.
-
Bake
- Bake in the preheated oven for 20 to 25 minutes, or until the tops are golden brown and flaky.
-
Cool and Decorate
- Allow to cool on a wire rack. If you like, once cooled, you can decorate with icing made from powdered sugar and milk mixed with food coloring!
Tips for Success
- Don’t Overfill: Less is more when it comes to the jam. Overfilling can lead to messy pastries.
- Use Cold Ingredients: If you’re making your own pie crust, keep your ingredients cold for a flakier crust.
- Keep an Eye on Baking: Ovens can vary; watch the pastries closely to prevent burning.
- Allow Cooling Time: Decorating too soon can melt your icing, so let the Pop Tarts cool completely before icing.
Easy Variations
- Different Jam Flavors: Substitute raspberry jam with strawberry, blueberry, or even chocolate spread for a different flavor profile.
- Ghostly Icing: Use white icing to create ghost faces on your Pop Tarts for extra Halloween fun.
- Chocolate Drizzle: Drizzle melted chocolate over the cooled Pop Tarts for added decadence.
- Nutty Add-in: Add a sprinkle of crushed nuts into the filling for a delightful crunch.
- Dairy-Free Option: Use a plant-based egg wash made from almond milk for a dairy-free version.
What to Serve with Halloween Pop Tarts
- Hot Chocolate: A warm cup of hot chocolate complements the sweetness of the Pop Tarts perfectly.
- Fresh Fruit: Serve with a side of sliced apples or strawberries for a refreshing balance.
- Coffee or Tea: These warm beverages make an inviting pairing for a cozy snack time.
- Ice Cream: A scoop of vanilla or pumpkin spice ice cream on the side can turn this treat into dessert perfection.
- Milk: You can’t go wrong with a classic glass of milk to wash down these delicious pastries.
Storage and Reheating
- Refrigerator Storage: Keep in an airtight container in the fridge for up to 5 days.
- Freezer Storage: For longer-term storage, freeze them in individual portions in a zip-top bag for up to 3 months.
- Best Reheating Method: Reheat in an oven at 350°F for about 10 minutes to restore their flaky texture. Alternatively, you can microwave them for about 15 seconds, but be cautious to avoid making them soggy.
- Meal Prep Note: These Pop Tarts freeze well, making them perfect for preparing ahead of time.
Common Mistakes to Avoid
- Not Sealing Properly: Ensure edges are crimped to prevent filling from spilling during baking.
- Using Warm Ingredients: If making from scratch, keep the dough cold for a better texture.
- Ignoring Cooling Time: Decorating too soon can ruin the aesthetics of your Pop Tarts.
Halloween Pop Tarts: Background & Cultural Inspiration
Halloween Pop Tarts blend the traditional concept of pastry with festive season themes. Pop Tarts originated in the U.S. in the 1960s but have evolved into a beloved breakfast item that transcends generations. The idea of decorating food for holidays is rooted in various cultures, and Halloween offers a colorful opportunity for creative expression. The use of fruit fillings not only adds flavor but also ties back to seasonal produce often associated with fall. Celebrating creativity in the kitchen, these Pop Tarts embody the spirit of the holiday while providing a tasty treat.
Frequently Asked Questions
Can I use homemade pie crust for this recipe?
Yes, you can certainly use homemade pie crust. It may take a bit longer but will add a fresh taste to your Pop Tarts.
How long can I store Halloween Pop Tarts?
Store them in an airtight container for up to 5 days in the refrigerator, or freeze them for up to 3 months.
Can I make these ahead of time?
Yes, you can prepare the Pop Tarts up to the point of baking, refrigerate, and bake them fresh when needed.
What other fillings can I use?
You can use any jam you like, chocolate spread, or even pie fillings for a creative twist.
What’s the best way to decorate them?
You can create icing with powdered sugar and milk, adding food coloring for fun designs, or simply sprinkle them with colored sugar before baking.
Final Thoughts
These Halloween Pop Tarts are an inviting and creative cooking project, perfect for celebrating the festive season. With their simple preparation, delightful flavors, and exciting decoration options, they offer a fun way to engage with family and friends. Give this recipe a try, and enjoy a scrumptious treat that captures the spirit of Halloween!
PrintHalloween Pop Tarts
Delightful homemade pastries filled with raspberry jam, perfect for Halloween festivities.
- Prep Time: 20 minutes
- Cook Time: 25 minutes
- Total Time: 45 minutes
- Yield: 8 servings
- Category: Dessert
- Method: Baking
- Cuisine: American
- Diet: Vegetarian
Ingredients
- 1 package of pie crusts (store-bought or homemade)
- 1 cup raspberry jam (or your favorite fruit jam)
- 1 egg (for egg wash)
- Sprinkles (optional, for decoration)
- Food coloring (optional, for icing decoration)
Instructions
- Preheat your oven to 350°F (175°C) to ensure it’s hot enough for baking.
- Roll out the pie crusts on a floured surface until they’re about 1/8 inch thick.
- Cut the dough into rectangles about 3×5 inches.
- Add about a tablespoon of raspberry jam in the center of half of the rectangles.
- Seal the remaining rectangles on top of the jam-filled pieces, pressing the edges and crimping with a fork.
- Egg wash by brushing the tops of the Pop Tarts with beaten egg.
- Bake in the preheated oven for 20 to 25 minutes, until golden brown and flaky.
- Cool on a wire rack and decorate as desired once cooled.
Notes
Don’t overfill with jam to prevent leakage. Allow cooling time before decorating.