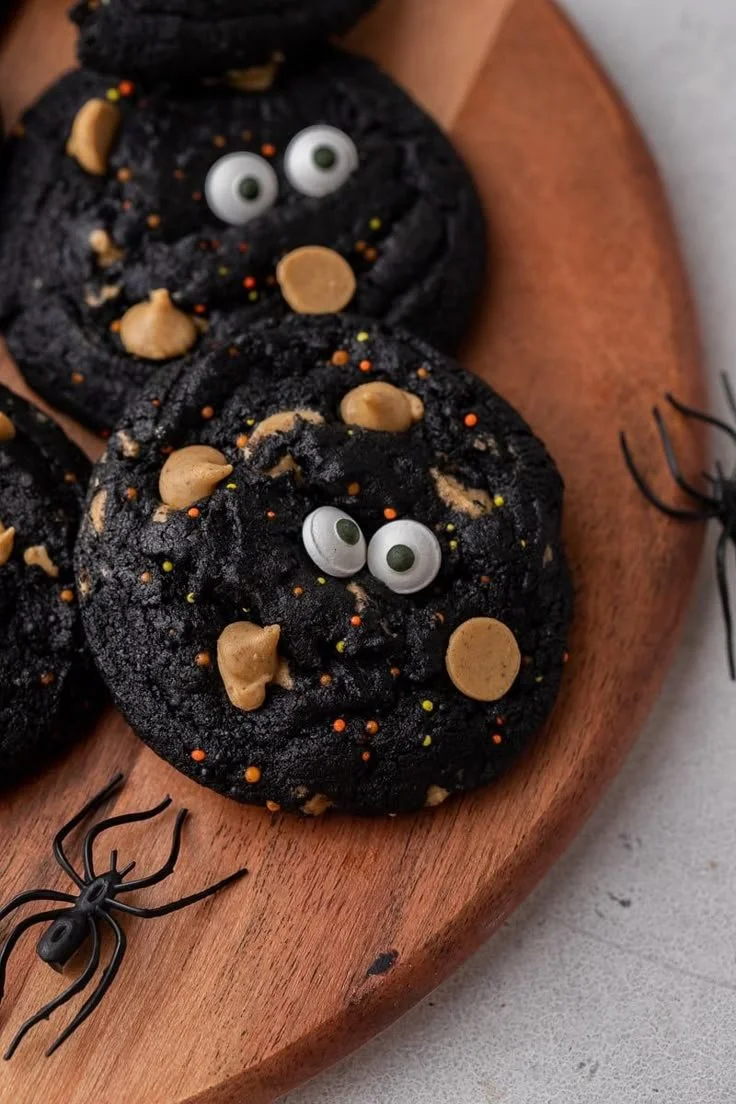
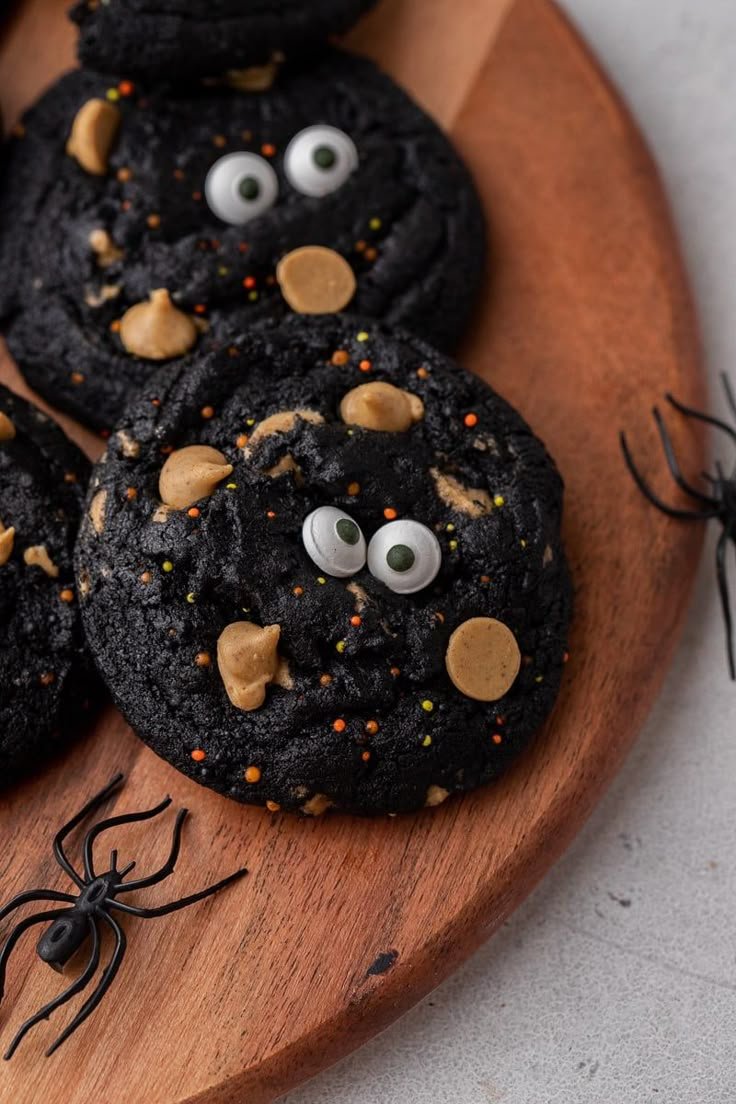
Get ready to treat your family and friends to some delectable Spooky Black Halloween Monster Cookies. These cookies are not only delightfully eerie in appearance but also irresistibly delicious in flavor. The combination of rich dark cocoa and vibrant orange accents makes them perfect for festive gatherings, ensuring a sweet spot in your Halloween celebrations.
Why You’ll Love Spooky Black Halloween Monster Cookies
- Easy to Make: With simple ingredients and straightforward steps, even beginner bakers can whip these cookies up without a hitch.
- Festively Fun: Their unique black color and spooky design make these cookies a perfect treat for Halloween parties or themed events.
- Customizable: Use different colors and toppings to give each cookie a unique look, making them even more exciting for kids and adults alike.
- Delicious Flavor: The rich tastes of cocoa and sweetness of frosting come together harmoniously, creating a delightful treat everyone will enjoy.
- Great for Sharing: These cookies are an easy option for potlucks, school events, or neighborhood gatherings, spreading joy and sweetness.
Recipe Overview
- Prep Time: 15 minutes
- Cook Time: 10-12 minutes
- Total Time: 25-27 minutes
- Servings: 24 cookies
- Difficulty Level: Easy
Ingredients You’ll Need for Spooky Black Halloween Monster Cookies
-
Dry Ingredients:
- 1 cup all-purpose flour
- ½ cup unsweetened cocoa powder (for a rich, dark flavor)
- ½ teaspoon baking soda
- ½ teaspoon salt
-
Wet Ingredients:
- ½ cup unsalted butter, softened (helps create a tender cookie)
- 1 cup granulated sugar
- 1 large egg
- 1 teaspoon vanilla extract
-
For Decoration:
- Orange frosting (store-bought or homemade)
- Candy eyes (available in stores or online)
How to Make Spooky Black Halloween Monster Cookies
-
Preheat the Oven: Preheat your oven to 350°F (175°C). Prepare a baking sheet by lining it with parchment paper.
-
Mix the Dry Ingredients: In a medium bowl, whisk together the flour, cocoa powder, baking soda, and salt until well combined.
-
Cream the Butter and Sugar: In a large bowl, use an electric mixer to cream the softened butter and granulated sugar together until light and fluffy, about 2-3 minutes.
-
Add Egg and Vanilla: Beat in the egg and vanilla extract, mixing until fully incorporated.
-
Combine Wet and Dry Ingredients: Gradually add the flour mixture to the wet ingredients. Mix until just combined; be careful not to overmix.
-
Scoop the Cookies: Using a cookie scoop or tablespoon, drop rounded balls of dough onto the prepared baking sheet, spacing them about 2 inches apart.
-
Bake the Cookies: Bake in the preheated oven for 10-12 minutes, or until the edges are set and the centers appear slightly underbaked. Remove them from the oven and let cool on the sheet for 5 minutes before transferring to a wire rack to cool completely.
-
Decorate: Once the cookies are completely cool, pipe or spread orange frosting on top and press candy eyes into the frosting for a fun spooky effect.
Tips for Success
- Correct Measurements: Make sure to accurately measure your flour and cocoa powder to avoid dry cookies.
- Don’t Overbake: For soft cookies, take them out while they are still slightly underbaked; they will continue to firm up as they cool.
- Chill Dough if Necessary: If your dough is too soft to scoop, chill it for about 30 minutes before baking for easier handling.
- Use Piping Bags: If you want cleaner lines while decorating, using a piping bag for the frosting can be very helpful.
- Experiment with Toppings: Try adding other candies, sprinkles, or edible glitter for an extra festive flair.
Easy Variations
- Add Doodles: Mix in some chocolate chips or chunks for extra chocolatey goodness.
- Spicy Touch: Add a pinch of cinnamon or cayenne pepper for a spicy kick in your cookie dough.
- Different Colors: Use different colors of frosting to represent other Halloween themes, such as green for monsters or purple for witches.
- Gluten-Free Option: Substitute all-purpose flour with a gluten-free blend for a gluten-free version.
- Frosting Options: Instead of orange frosting, try using white frosting tinted with food coloring for unique designs.
What to Serve with Spooky Black Halloween Monster Cookies
- Milk: A classic pairing that balances the sweetness of the cookies.
- Pumpkin Spice Latte: This seasonal drink enhances the Halloween vibes.
- Hot Chocolate: Enjoy with a warm cup of cocoa for a cozy treat.
- Fall Fruit Salad: A refreshing contrast to the richness of the cookies.
- Candy Corn: For a traditional seasonal candy that adds additional Halloween flair.
Storage and Reheating
- Refrigerator Storage: Store cookies in an airtight container at room temperature for up to 1 week.
- Freezer Storage: You can freeze unbaked cookie dough balls by placing them on a baking sheet to firm up, then transferring to a freezer bag or container for up to 3 months.
- Best Reheating Method: For the best texture, reheat cookies in a preheated oven at 350°F for about 5 minutes.
- Preserve Texture: Keep cookies in a sealed container to prevent them from becoming dry.
- Meal Prep Note: Prepare the dough ahead of time and freeze; bake fresh cookies when ready to serve.
Common Mistakes to Avoid
- Overmixing the Dough: Be mindful not to overmix once you combine the wet and dry ingredients to maintain a tender cookie texture.
- Incorrect Oven Temperature: Ensure your oven is accurately calibrated; an oven thermometer can help.
- Not Letting Cookies Cool: Allow to cool on a wire rack; if left on the baking sheet, they may continue to bake and become hard.
- Skipping the Frosting: Don’t skip the decoration—it makes the cookies visually appealing and fun for Halloween.
- Using Stale Ingredients: Always check the freshness of baking soda and cocoa; old ingredients can affect the cookie’s texture and taste.
Spooky Black Halloween Monster Cookies: Background & Cultural Inspiration
Every year, Halloween brings out the creativity in bakers. These Spooky Black Halloween Monster Cookies draw inspiration from the playful side of Halloween, where treats often take on a whimsical character. Using bold colors like black and orange speaks to the themes of the holiday while engaging children and adults alike. Halloween treats often revolve around traditional ingredients that embody both sweetness and a light-hearted spookiness, making them a favorite for parties and community gatherings.
Frequently Asked Questions
Can I make the dough ahead of time?
Yes, you can prepare the dough and refrigerate it for up to 24 hours before baking. Just let it warm slightly before scooping and baking.
Can I use a different flavor of frosting?
Absolutely! While orange frosting fits the Halloween theme, you can use any color or flavor that complements the cookie.
What is the best way to store these cookies?
Store them in an airtight container at room temperature for up to a week, or freeze for longer storage.
How can I make the cookies chewier?
For chewier cookies, slightly reduce the amount of flour and increase the baking time, keeping an eye on them while baking.
What can I substitute for the butter in this recipe?
You can use coconut oil or a plant-based butter substitute for a dairy-free version.
Final Thoughts
Spooky Black Halloween Monster Cookies are a delightfully fun and easy treat to make for Halloween festivities. With their rich chocolate flavor and playful designs, they can bring joy to any celebration. Try making these cookies to share with family and friends, and watch as they disappear faster than you can bake them! Enjoy the process and the smiles that come with these special treats.
PrintSpooky Black Halloween Monster Cookies
Deliciously eerie cookies with rich cocoa and vibrant orange accents, perfect for Halloween celebrations.
- Prep Time: 15 minutes
- Cook Time: 12 minutes
- Total Time: 27 minutes
- Yield: 24 cookies
- Category: Dessert
- Method: Baking
- Cuisine: American
- Diet: Vegetarian
Ingredients
- 1 cup all-purpose flour
- ½ cup unsweetened cocoa powder
- ½ teaspoon baking soda
- ½ teaspoon salt
- ½ cup unsalted butter, softened
- 1 cup granulated sugar
- 1 large egg
- 1 teaspoon vanilla extract
- Orange frosting (store-bought or homemade)
- Candy eyes
Instructions
- Preheat your oven to 350°F (175°C). Prepare a baking sheet by lining it with parchment paper.
- Mix the dry ingredients: In a medium bowl, whisk together the flour, cocoa powder, baking soda, and salt until well combined.
- Cream the butter and sugar: In a large bowl, use an electric mixer to cream the softened butter and granulated sugar together until light and fluffy, about 2-3 minutes.
- Add the egg and vanilla: Beat in the egg and vanilla extract, mixing until fully incorporated.
- Combine wet and dry ingredients: Gradually add the flour mixture to the wet ingredients. Mix until just combined; be careful not to overmix.
- Scoop the cookies: Using a cookie scoop or tablespoon, drop rounded balls of dough onto the prepared baking sheet, spacing them about 2 inches apart.
- Bake in the preheated oven for 10-12 minutes, or until the edges are set and the centers appear slightly underbaked. Remove them from the oven and let cool on the sheet for 5 minutes before transferring to a wire rack to cool completely.
- Decorate: Once the cookies are completely cool, pipe or spread orange frosting on top and press candy eyes into the frosting for a fun spooky effect.
Notes
Ensure you let the cookies cool completely before decoration to prevent frosting from melting.