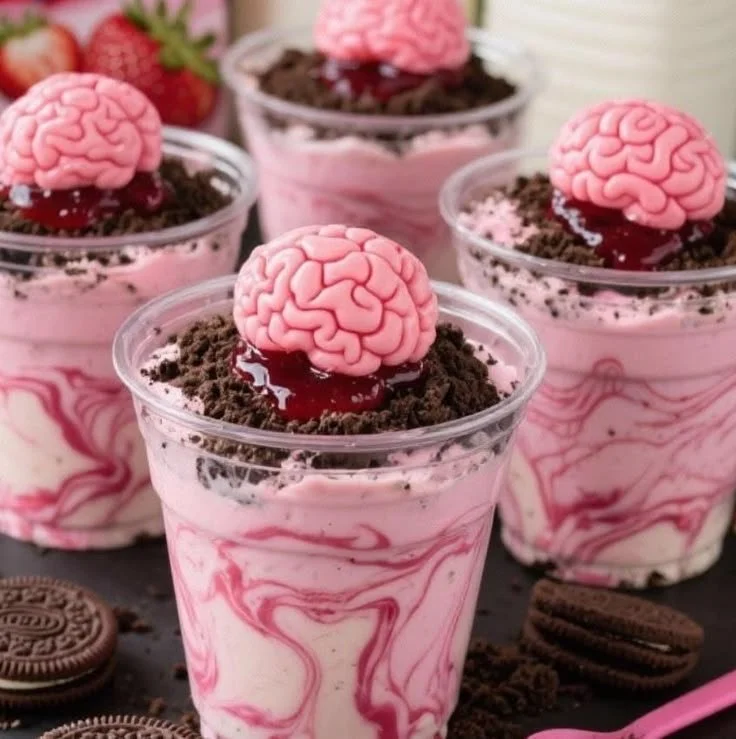
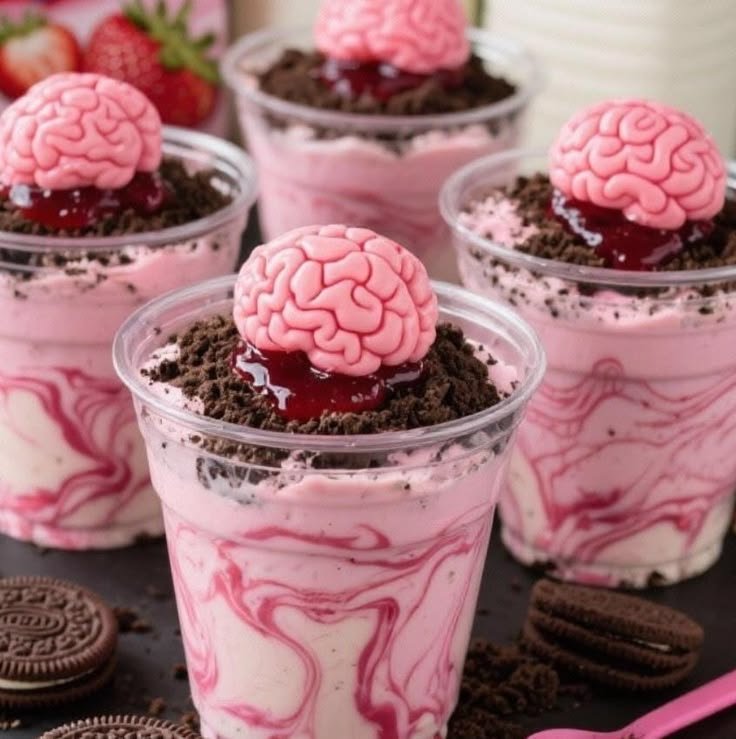
Zombie Brain Dirt Cups are a delightfully spooky treat perfect for Halloween gatherings or any fun celebration. Combining creamy strawberry pudding, vibrant raspberry sauce, and crunchy chocolate cookie "dirt," these cups not only look fantastic but are a hit with kids and adults alike. This recipe is both easy to prepare and offers a playful way to enjoy dessert!
Why You’ll Love Zombie Brain Dirt Cups
- Fun Presentation: These dessert cups are visually striking with their creepy "brain" effect, making them a great conversation starter.
- Quick and Easy: With minimal prep time, you can whip these up in no time, perfect for last-minute gatherings or celebrations.
- Versatile Ingredients: Using basic pantry staples means you can easily substitute ingredients based on what you have available.
- Interactive and Customizable: Let guests add their own gummy worms or extra toppings, making the experience interactive and personal.
- Kid-Friendly: These cups combine sweet flavors and a playful theme that kids absolutely adore, ensuring they leave the table with big smiles.
Recipe Overview
- Prep Time: 15 minutes
- Cook Time: 0 minutes (requires chilling)
- Total Time: 2 hours (includes chilling)
- Servings: 4
- Difficulty Level: Easy
Ingredients You’ll Need for Zombie Brain Dirt Cups
-
Pudding Layer:
- 1 box strawberry pudding (check for instant variety for ease)
-
Raspberry Sauce Layer:
- 1 cup raspberry sauce (store-bought or homemade)
-
Dirt Layer:
- 1 cup chocolate cookies, crushed (use classic chocolate wafer cookies for better texture)
-
Toppings:
- Whipped cream (for that spooky touch)
- Gummy worms (optional, for decoration)
-
Supporting Tools:
- Clear cups for serving (to showcase the layers)
here
How to Make Zombie Brain Dirt Cups
-
Prepare the Strawberry Pudding:
- Follow the instructions on the strawberry pudding box. Mix with cold milk until well combined and set aside to chill in the refrigerator for at least 1 hour until firm.
-
Mix the Raspberry Sauce:
- In a separate bowl, stir the raspberry sauce to create a smooth texture. This will be the "vein" component of your brain cups.
-
Crush the Cookies:
- Place your chocolate cookies in a resealable bag and crush them into fine crumbs. This will represent the "dirt" on top of your treat.
-
Layer the Cups:
- In each clear cup, start with a layer of strawberry pudding, followed by a layer of raspberry sauce. Then sprinkle a generous amount of crushed chocolate cookies on top.
-
Add the Finishing Touches:
- Top each cup with a dollop of whipped cream. If desired, garnish with gummy worms for that creepy touch.
-
Serve and Enjoy:
- These cups are best served immediately for the freshest taste, but they can also be stored in the refrigerator until you’re ready to enjoy.
Tips for Success
- Chill Time Matters: Ensure the pudding is fully set before layering to avoid mixing the layers together.
- Customize Layers: Feel free to adjust the quantities of pudding and raspberry sauce based on your taste preference.
- Crush Cookies Thoroughly: The finer the cookie crumbs, the better they will mimic the dirt texture.
- Make Ahead: You can prepare the pudding and raspberry sauce a day in advance, making assembly a breeze when guests arrive.
- Use Clear Cups: The clear cups not only allow the beautiful layers to shine but also add to the overall spooky aesthetic.
Easy Variations
- Berry Swap: Substitute the raspberry sauce with strawberry or blueberry sauce for a different flavor.
- Healthy Option: Use sugar-free pudding and low-calorie whipped topping for a lighter version.
- Spice it Up: Add a pinch of cinnamon to the crushed cookies for a warm, spiced flavor.
- Chocolate Pudding Base: For a richer taste, use chocolate pudding instead of strawberry and layer it with a berry sauce.
- Gummy Favors: Instead of gummy worms, use chocolate candy spiders or eyeballs for an even scarier look.
What to Serve with Zombie Brain Dirt Cups (Digital PDF Download)
- Fruit Skewers: Fresh fruits are a light, refreshing contrast to the sweetness of the cups.
- Halloween-themed Cheese Board: A mix of cheeses, crackers, and cured meats can balance the dessert with savory notes.
- Spooky Cupcakes: These can complement the theme and offer another flavor option alongside the dirt cups.
- Popcorn: Flavored popcorn (like caramel or chocolate) can provide a fun and crunchy side to this soft treat.
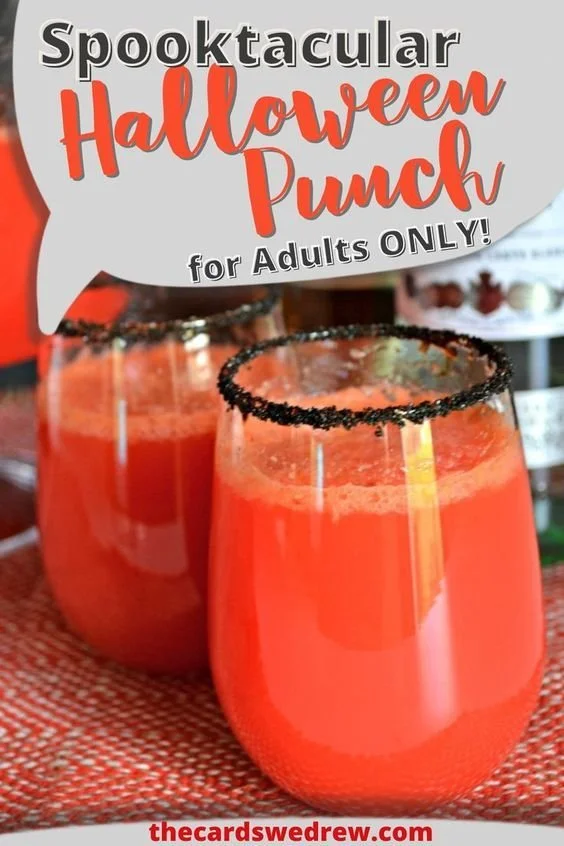
- Halloween Punch: A fruity punch can enhance the festive spirit and keep guests refreshed.
Storage and Reheating
- Refrigerator Storage: Keep the cups covered in the fridge for up to 2 days for best freshness.
- Freezer Storage: Not recommended, as the texture of the pudding and whipped cream may suffer when frozen.
- Reheating: There’s no need to reheat; serve chilled directly from the refrigerator.
- Preserve Texture: If you plan to store, layer the ingredients right before serving to maintain the texture and prevent sogginess.
Common Mistakes to Avoid
- Overmixing Pudding: Follow the package instructions closely to avoid a grainy texture.
- Ineffective Layering: Be careful to layer gently to prevent bleeding of colors.
- Neglecting Chill Time: Skipping the chilling time can lead to poor texture and separation of layers.
- Overcomplicating Flavor: Keep the combinations simple to ensure harmony in flavor.
- Using Dark-Colored Containers: Clear cups are key for an appealing presentation and to see the layers.
Zombie Brain Dirt Cups: Background & Cultural Inspiration
Zombie Brain Dirt Cups draw inspiration from Halloween traditions that celebrate the macabre and fun. This playful dessert plays into the spooky season’s festive spirit, embracing creativity and imagination through food. Such treats also reflect cultural ties to indulging children’s love for adventure and storytelling during Halloween, where tales of ghosts and monsters fuel excitement for the festivities. The fun visual aspect of these cups makes them a staple for Halloween parties, school events, and themed gatherings, showcasing how food can have a playful and artistic side.
Frequently Asked Questions
Can I make these a day in advance?
Yes, you can prepare the pudding and raspberry sauce a day ahead. Just layer them on the day of serving for the best texture.
What if I can’t find raspberry sauce?
You could easily use other berry sauces like blueberry or even a homemade fruit compote.
How should I store leftovers?
Keep any leftovers in the refrigerator, covered, and consume within two days for optimal taste and texture.
Can I use dairy-free alternatives?
Absolutely! Look for plant-based milk for the pudding and non-dairy whipped cream for a dairy-free version.
How can I adjust the sweetness level?
You can reduce the sweet components or opt for sugar-free pudding and sauces for a less sweet treat.
Final Thoughts
Zombie Brain Dirt Cups are an easy, delicious way to celebrate the spooky season, offering a blend of creamy, fruity, and crunchy textures. These fun, layer-packed treats are sure to impress both kids and adults, making them a fantastic addition to your next gathering. Try this recipe today, and enjoy an eerily delightful dessert that encourages creativity and fun at the table!
PrintZombie Brain Dirt Cups

A spooky dessert combining creamy strawberry pudding, vibrant raspberry sauce, and crunchy chocolate cookie ‘dirt.’ Perfect for Halloween gatherings.
- Prep Time: 15 minutes
- Cook Time: 0 minutes
- Total Time: 120 minutes
- Yield: 4 servings
- Category: Dessert
- Method: Chilling
- Cuisine: American
- Diet: Vegetarian
Ingredients
- 1 box strawberry pudding (instant variety preferred)
- 1 cup raspberry sauce (store-bought or homemade)
- 1 cup chocolate cookies, crushed
- Whipped cream (for topping)
- Gummy worms (optional, for decoration)
- Clear cups for serving
Instructions
- Prepare the strawberry pudding: Follow the box instructions and mix with cold milk until combined. Chill in the refrigerator for at least 1 hour.
- Mix the raspberry sauce in a separate bowl until smooth.
- Crush the chocolate cookies in a resealable bag until fine.
- Layer the cups: Start with strawberry pudding, then raspberry sauce, and finally sprinkle crushed chocolate cookies on top.
- Add a dollop of whipped cream and garnish with gummy worms if desired.
- Serve immediately for the freshest taste or store in the refrigerator.
Notes
Ensure the pudding is fully set before layering for best results. Use clear cups for presentation.