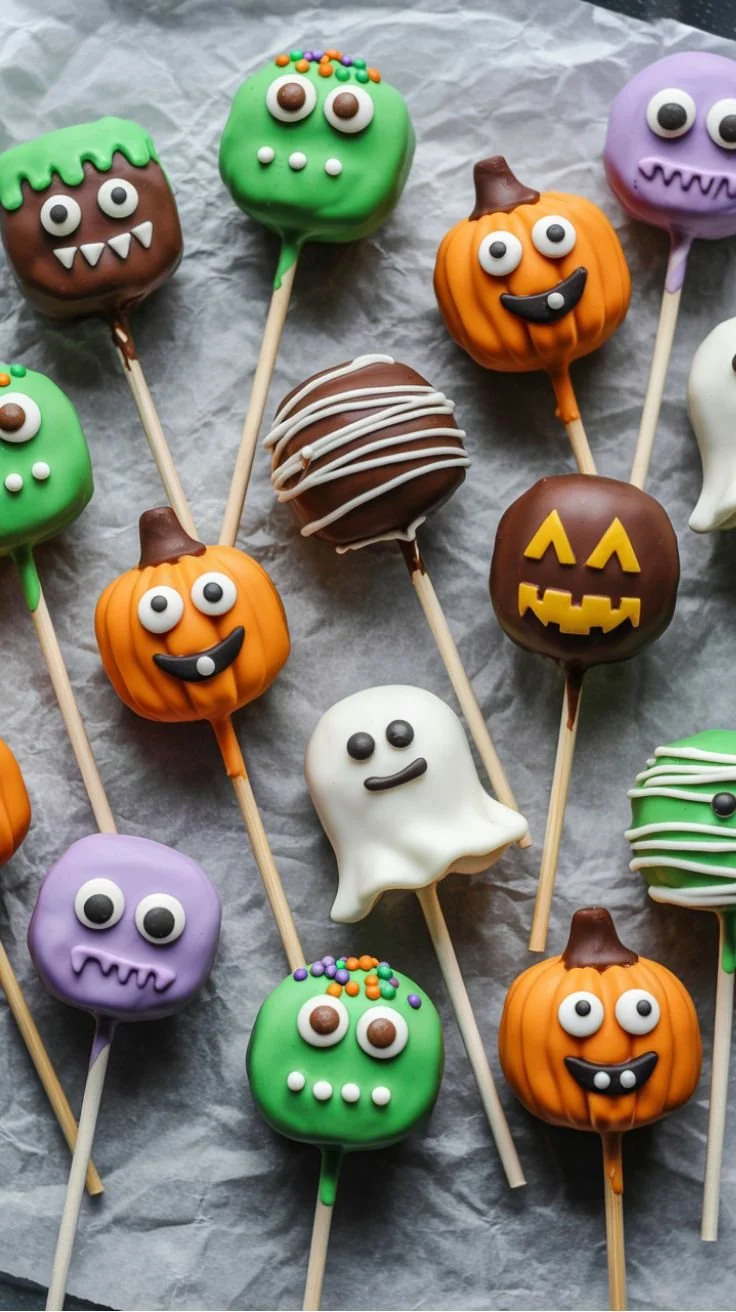
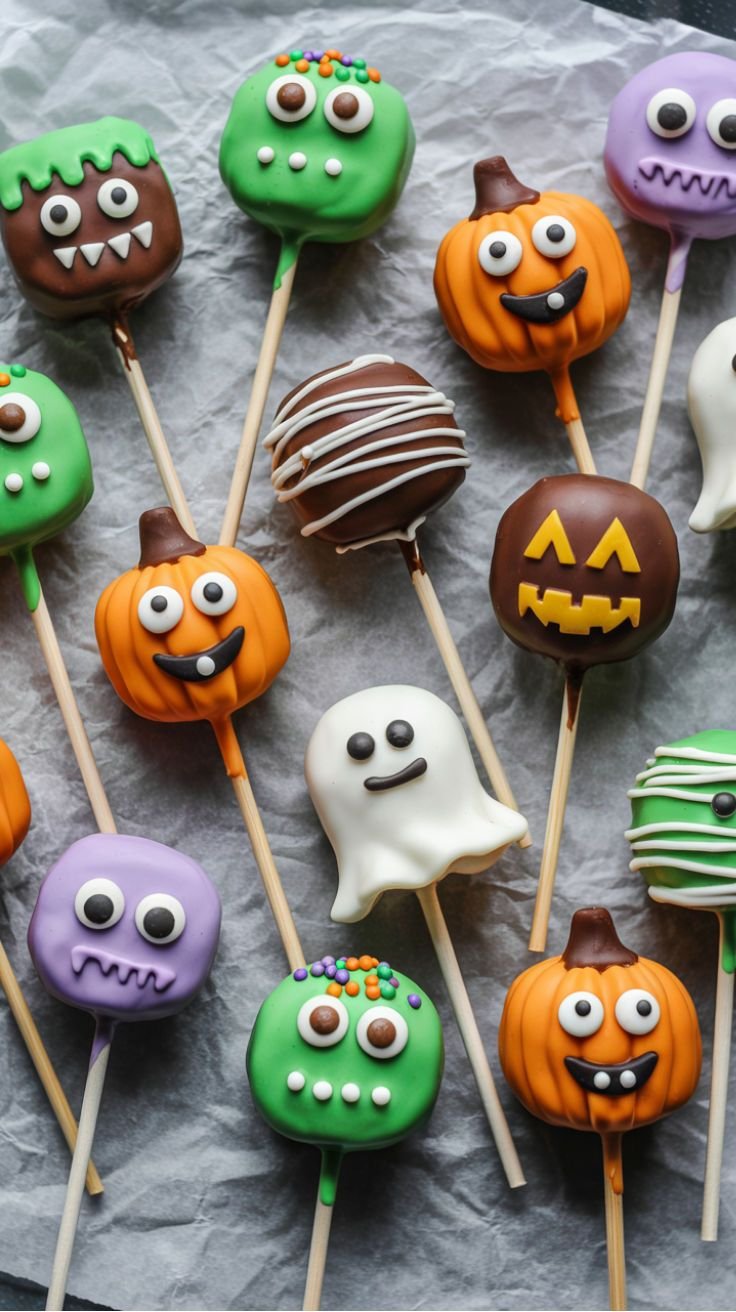
Making Easy Halloween Cake Pops is a delightful way to celebrate the season. These fun and festive treats are not only visually appealing but also incredibly simple to prepare, making them perfect for both novice and experienced bakers. Whether you’re hosting a Halloween party or just want to enjoy a sweet fall treat, these cake pops are sure to please both kids and adults alike.
Why You’ll Love Easy Halloween Cake Pops
- Perfect for All Skill Levels: Even if you’re a beginner, this recipe is straightforward and involves minimal technical skills.
- Customizable Designs: You can easily personalize your cake pops with various colors, sprinkles, and decorations to match any Halloween theme.
- Fun for Parties: These treats make excellent additions to Halloween parties, school events, or themed gatherings.
- Make Ahead: Prepare the cake pops in advance and store them, making party prep easier and stress-free.
- Kid-Friendly: Kids will love helping to decorate these cake pops, making it a fun family activity.
Recipe Overview
- Prep Time: 20 minutes
- Cook Time: 30 minutes
- Total Time: 50 minutes (plus cooling time)
- Servings: 20 cake pops
- Difficulty Level: Easy
Ingredients You’ll Need for Easy Halloween Cake Pops
- 1 box of cake mix (any flavor): Choose your favorite flavor for a personalized taste.
- 2 cups of frosting: This helps bind the cake and adds sweetness.
- Candy melts (various colors): These will be used for coating the pops; opt for colors that fit your Halloween theme.
- Lollipop sticks: These are essential for the cake pop structure and are available at most craft stores.
- Sprinkles (for decoration): Choose seasonal or Halloween-themed sprinkles to enhance the visual appeal.
How to Make Easy Halloween Cake Pops
- Bake the Cake: Preheat your oven and bake the cake according to the box instructions. Allow it to cool completely.
- Crumble the Cake: Once cooled, crumble the baked cake into a large mixing bowl.
- Mix in the Frosting: Add the frosting to the crumbled cake. Mix well until the mixture is fully combined and holds together.
- Shape the Cake Balls: Scoop the mixture and roll it into small balls, placing them on a baking sheet.
- Insert Lollipop Sticks: Gently push a lollipop stick into each ball, ensuring it’s inserted securely.
- Freeze for Setting: Place the baking sheet in the freezer for about 30 minutes, allowing the cake balls to set and firm up.
- Melt the Candy Coating: In a microwave-safe bowl, melt the candy melts until smooth, stirring at intervals to prevent burning.
- Dip the Cake Pops: Dip each cake pop into the melted candy coating, ensuring it is fully covered.
- Decorate with Sprinkles: Allow the excess candy to drip back into the bowl before decorating the pops with sprinkles.
- Cool Completely: Place the cake pops upright in a stand or a piece of foam to cool completely until the coating is set.
Tips for Success
- Ensure Cake is Cool: Warm cake will melt the frosting and make the mixture too soggy to form proper balls.
- Avoid Over-Mixing: Mix just until combined to keep the cake pops light and fluffy.
- Use Quality Candy Melts: For the best coating, opt for quality candy melts that melt smoothly and set well.
- Chill Before Dipping: Make sure the cake balls are well-chilled before dipping to prevent falling apart in the coating.
- Experiment with Flavors: Feel free to mix different flavors within the cake and frosting for unique combinations.
Easy Variations
- Flavor Twist: Try spice cake mix for a seasonal twist, or use chocolate cake for a richer flavor.
- Add-In Options: Mix in mini chocolate chips, crushed cookies, or flavored extracts for more depth.
- Dairy-Free Option: Use dairy-free frosting and almond or coconut-based candy melts.
- Healthier Version: Substitute cake mix with a healthier alternative or make a homemade cake using whole ingredients.
- Decorative Themes: Use different sprinkles or edible glitter to create spooky designs like ghosts or pumpkins.
What to Serve with Easy Halloween Cake Pops
- Hot Apple Cider: Pair these sweet treats with the warmth of spiced apple cider for a cozy fall experience.
- Pumpkin Spice Latte: The flavors of pumpkin spice will complement the sweetness of the cake pops.
- Chocolate Fondue: A delightful chocolate fondue can be an interactive dessert option alongside your cake pops.
- Halloween-Themed Snack Platter: Serve the cake pops alongside a platter of themed snacks like spider cookies and monster cupcakes to create a festive spread.
- Fruit Skewers: Pairing with fresh fruit adds a refreshing contrast to the sweetness of the cake pops.
Storage and Reheating
- Refrigerator Storage: Store leftover cake pops in an airtight container in the refrigerator for up to a week.
- Freezer Storage: For longer storage, freeze them for up to a month. Just ensure they’re wrapped well to prevent freezer burn.
- Best Reheating Method: Cake pops are best enjoyed cold or at room temperature; do not reheat as it will affect their texture.
- Preserving Texture: Always allow cake pops to cool completely before sealing them in a container to maintain their structural integrity.
Common Mistakes to Avoid
- Not Allowing the Cake to Cool: Ensure your cake is completely cooled before crumbling and mixing to avoid sogginess.
- Too Much Frosting: Adding too much frosting can make the mixture too wet and hard to shape, so add gradually and test consistency.
- Skipping the Freezing Step: Freezing helps to firm up the cake pops, making the dipping process easier and preventing breakage.
- Neglecting to Stir Candy Melts: Stirring while melting prevents scorching and ensures an even texture.
- Over-Dipping: Avoid leaving too much excess coating on the pops, as it can lead to a thick, uneven layer once hardened.
Easy Halloween Cake Pops: Background & Cultural Inspiration
Cake pops originated as a fun, trendy dessert concept, gaining popularity thanks to social media and various dessert shops. These little bites of cake on a stick offer a whimsical treat, appealing especially to children. In many cultures, food on a stick is celebrated for its festive nature, making cake pops a delightful addition to holiday celebrations. With Halloween, the customization of toppings and colors allows for great creativity, turning simple treats into themed delights that echo the spirit of the season.
Frequently Asked Questions
Can I use homemade cake instead of a box mix?
Absolutely! You can bake your favorite homemade cake using your preferred ingredients.
How long can I store cake pops?
Cake pops can be stored in the refrigerator for up to a week or in the freezer for up to a month.
Can I use chocolate instead of candy melts?
Yes, you can use chocolate, but ensure to temper it properly for best results in coating.
What can I do if my candy melts are too thick?
If your candy melts are too thick, add a little shortening or vegetable oil to thin them out for easier dipping.
Can I make these in advance?
Yes, you can prepare and decorate the cake pops a few days in advance; just store them properly to maintain freshness.
Final Thoughts
Easy Halloween Cake Pops are not only a festive treat but also a wonderful way to gather family and friends during the season. With their fun designs and sweet flavors, these cake pops make any gathering a little more special. Enjoy making these treats, and don’t forget to let your creativity shine as you decorate each pop!
PrintEasy Halloween Cake Pops

Delightful and festive cake pops that are simple to prepare, perfect for Halloween parties and family gatherings.
- Prep Time: 20 minutes
- Cook Time: 30 minutes
- Total Time: 50 minutes
- Yield: 20 cake pops
- Category: Dessert
- Method: Baking
- Cuisine: American
- Diet: Vegetarian
Ingredients
- 1 box of cake mix (any flavor)
- 2 cups of frosting
- Candy melts (various colors)
- Lollipop sticks
- Sprinkles (for decoration)
Instructions
- Preheat your oven and bake the cake according to the box instructions. Allow it to cool completely.
- Crumble the baked cake into a large mixing bowl.
- Add the frosting to the crumbled cake. Mix well until the mixture is fully combined and holds together.
- Scoop the mixture and roll it into small balls, placing them on a baking sheet.
- Gently push a lollipop stick into each ball, ensuring it’s inserted securely.
- Place the baking sheet in the freezer for about 30 minutes, allowing the cake balls to set and firm up.
- Melt the candy melts until smooth, stirring at intervals to prevent burning.
- Dip each cake pop into the melted candy coating, ensuring it is fully covered.
- Allow the excess candy to drip back into the bowl before decorating the pops with sprinkles.
- Place the cake pops upright in a stand or a piece of foam to cool completely until the coating is set.
Notes
Ensure the cake is cooled completely to prevent sogginess. Quality candy melts will give the best results.