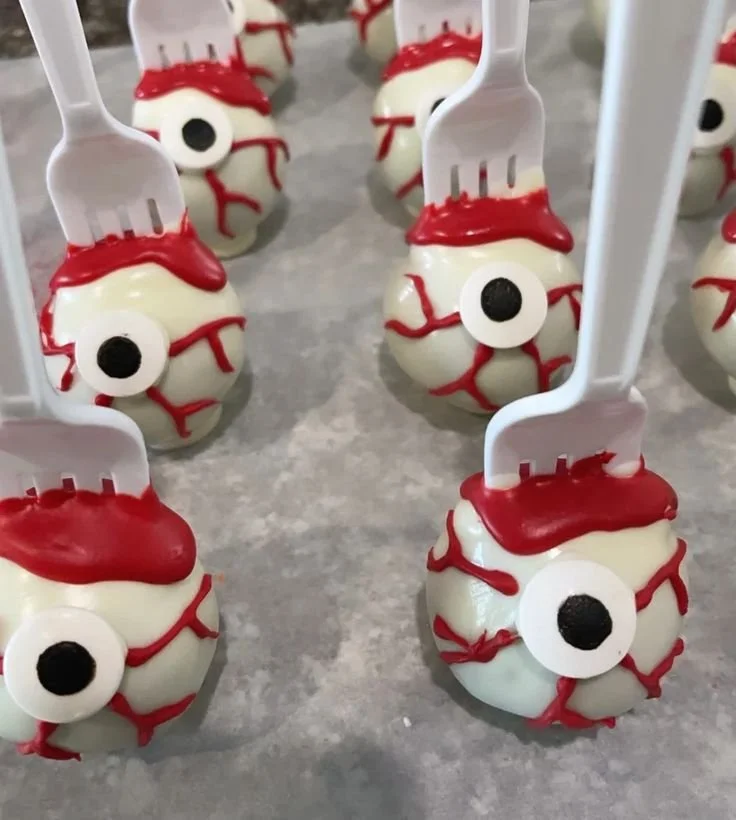
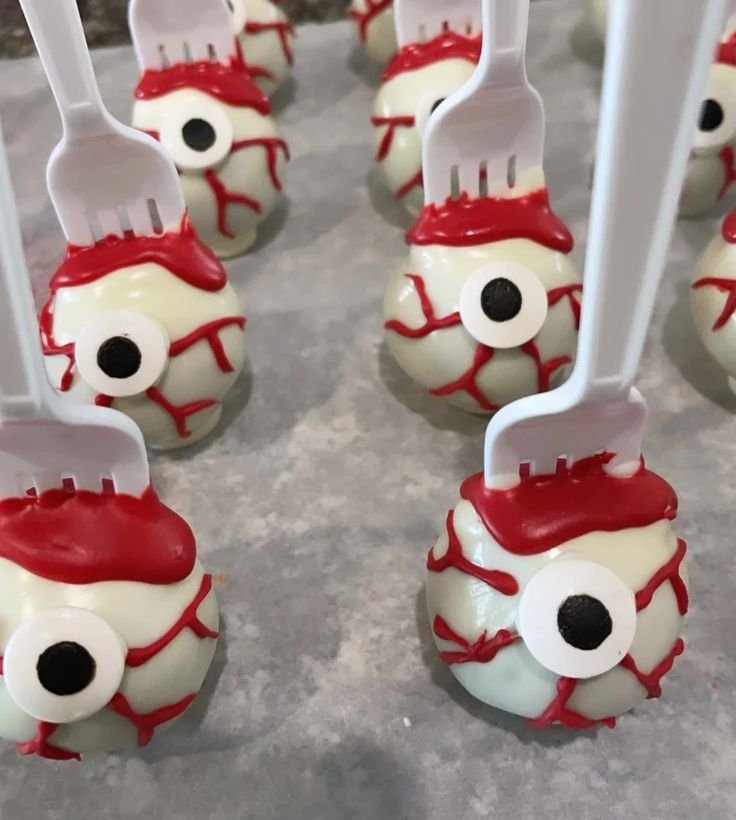
Halloween Eyeball Cake Pops are a fun and spooky treat that’s perfect for any Halloween gathering. Easy to make and sure to delight both kids and adults, these cake pops combine delicious flavors with an eye-catching design. Whether you’re hosting a party or looking for a fun project with the kids, these cake pops are the ideal festive addition.
Why You’ll Love Halloween Eyeball Cake Pops
- Fun and Creative: These cake pops are not just tasty; they allow for creativity in decorating, making them a fun project for the whole family.
- Perfect for Parties: Halloween Eyeball Cake Pops make an impressive centerpiece for any Halloween gathering or party, delighting guests with their unique design.
- Kid-Friendly: The process of rolling the cake into balls and decorating them is fun and safe for kids, making it a great cooking activity.
- Easy to Customize: You can switch up the flavors of the cake and frosting or add different decorations to fit your theme.
- Make Ahead: These cake pops can be made in advance, allowing you to enjoy your Halloween party without stress.
Recipe Overview
- Prep Time: 30 minutes
- Cook Time: 30 minutes (for baking the cake)
- Total Time: 1 hour
- Servings: 24 cake pops
- Difficulty Level: Easy
Ingredients You’ll Need for Halloween Eyeball Cake Pops
- For the Cake Pops:
- Cake (flavor of your choice)
- Cream cheese frosting
- For Decorating:
- White chocolate
- Red gel food coloring
- Black gel food coloring
- Candy eyeballs or chocolate chips
- Lollipop sticks
- Ribbon for packaging
Notes:
- Choose a cake flavor that you love; chocolate or vanilla work well.
- Substitute buttercream for cream cheese frosting if you prefer a sweeter taste.
How to Make Halloween Eyeball Cake Pops
Step 1: Bake the Cake
Prepare your cake according to the package instructions, then let it cool completely.
Step 2: Crumble the Cake
Once cooled, crumble the cake into a large bowl until it resembles fine crumbs.
Step 3: Mix with Frosting
Add cream cheese frosting to the crumbled cake. Mix until the cake crumbs are fully combined with the frosting, creating a dough-like mixture.
Step 4: Shape into Balls
Roll the mixture into small balls, about 1 to 1.5 inches in diameter. Place the balls on a baking sheet lined with parchment paper.
Step 5: Freeze the Cake Balls
Put the baking sheet in the freezer for about 30 minutes to firm up the cake balls.
Step 6: Melt the White Chocolate
Melt the white chocolate in a microwave-safe bowl at 30-second intervals, stirring between each until completely smooth.
Step 7: Dip the Cake Balls
Remove the cake balls from the freezer. Dip each ball into the melted white chocolate, ensuring it’s fully coated. Allow the excess chocolate to drip off.
Step 8: Insert Lollipop Sticks
Insert a lollipop stick into the center of each cake ball before the chocolate sets.
Step 9: Decorate with Blood
Using red gel food coloring, drizzle “blood” onto the candy eyeballs and place them on top of each cake pop.
Step 10: Add Eyeball Enhancements
Drizzle black gel food coloring around the candy eyeballs to enhance the ‘eyeball’ effect.
Step 11: Let Set
Allow the cake pops to set completely before individually wrapping them with ribbons for decoration.
Tips for Success
- Ensure the cake is fully cooled before crumbling; warm cake can create a soggy mixture.
- Freeze the cake balls long enough to prevent them from falling off the sticks when dipped in chocolate.
- Use a deep bowl to dip the cake pops to completely coat them in white chocolate.
- Decorate quickly before the chocolate hardens to achieve a good look.
- Store any leftover melted white chocolate for future use—just reheat gently when ready.
Easy Variations
- Different Frosting: Try using chocolate or vanilla frosting for diverse flavor profiles.
- Flavored Coatings: Replace white chocolate with milk or dark chocolate for a richer taste.
- Nutty Surprise: Fold crushed nuts or sprinkles into the cake mixture for added texture.
- Vegan Option: Use a vegan cake mix and frosting to create dairy-free cake pops.
- Seasonal Themes: Adjust the color of the gel food coloring to fit other holidays, such as red and green for Christmas.
What to Serve with Halloween Eyeball Cake Pops
- Hot Apple Cider: A warm, spiced drink complements the sweetness of the cake pops.
- Pumpkin Soup: The savory flavors of pumpkin soup create a delightful contrast.
- Chocolate Fudge Brownies: Pairing treats with similar indulgent flavors is always a crowd-pleaser.
- Spooky Cheese Board: A variety of cheeses and crackers can serve as a savory balance to the sweetness of the cake pops.
- Ghostly Cupcakes: Serve mini cupcakes with ghost decorations for a completely themed dessert spread.
Storage and Reheating
- Refrigerator Storage: Cake pops can be stored in an airtight container in the fridge for up to one week.
- Freezer Storage: For longer storage, freeze the cake pops before decorating. They can remain frozen for up to 2 months.
- Best Reheating Method: If frozen, thaw the pops in the refrigerator before serving. Do not refreeze after thawing to maintain texture.
Common Mistakes to Avoid
- Not Letting Cake Cool: Crumbling warm cake can lead to a gummy texture.
- Overdipping: Dipping too long in white chocolate can make the pops too heavy and cause them to fall off the sticks.
- Skipping the Freezing Step: Failing to freeze the cake balls can result in unstable cake pops during decoration.
- Inconsistent Sizes: Make sure to roll the cake balls evenly so they cook and set uniformly.
- Lack of Color Contrast: Remember to have a good color contrast with decorations for visual appeal—too much white can make them look bland.
Halloween Eyeball Cake Pops: Background & Cultural Inspiration
Halloween cake pops represent a fun twist on traditional baked treats. They embrace the Halloween spirit by combining sweet flavors with whimsical, spooky designs. Cake pops gained popularity in the cupcake craze of the 2000s and have since evolved, becoming a sought-after dessert option for celebrations. These cake pops can symbolize creativity during a day that honors both the festive and the supernatural, offering a playful way to enjoy a seasonal treat.
Frequently Asked Questions
Can I use any cake flavor?
Yes, choose any flavor that you enjoy, such as chocolate, vanilla, or red velvet.
How long do cake pops last?
When stored properly, cake pops can last in the refrigerator for up to one week or in the freezer for two months.
Can I make these ahead of time?
Yes, you can bake the cake and shape the pops in advance. Decorate them the day before your event for the best taste and appearance.
Is cream cheese frosting necessary?
You can use buttercream or other frosting types if you prefer, but cream cheese adds a nice tang that complements sweetness.
How do I avoid melting chocolate?
Ensure your chocolate stays at a consistent, low temperature while melting, and avoid any moisture getting into the bowl, as this can cause it to seize.
Final Thoughts
Halloween Eyeball Cake Pops are a delightful and fun treat that everyone will love. Their spooky design makes them perfect for Halloween parties, and their easy preparation allows even novice bakers to join in the fun. This recipe encourages creativity and is sure to be a hit with friends and family. Make sure to give it a try this Halloween season!
PrintHalloween Eyeball Cake Pops
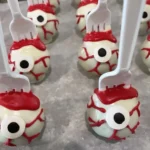
Fun and spooky cake pops, perfect for any Halloween gathering, that blend delicious flavors with a creative design.
- Prep Time: 30 minutes
- Cook Time: 30 minutes
- Total Time: 60 minutes
- Yield: 24 cake pops
- Category: Dessert
- Method: Baking
- Cuisine: American
- Diet: Vegetarian
Ingredients
- 1 box cake mix (flavor of your choice)
- 1 cup cream cheese frosting
- 1 cup white chocolate
- Red gel food coloring
- Black gel food coloring
- Candy eyeballs or chocolate chips
- Lollipop sticks
- Ribbon for packaging
Instructions
- Bake the cake according to package instructions and let it cool completely.
- Crumble the cooled cake into a large bowl until it resembles fine crumbs.
- Add cream cheese frosting to the crumbled cake and mix until fully combined.
- Roll the mixture into small balls, about 1 to 1.5 inches in diameter.
- Place the balls on a baking sheet lined with parchment paper.
- Freeze the baking sheet for about 30 minutes to firm up the cake balls.
- Melt the white chocolate in a microwave-safe bowl at 30-second intervals, stirring until smooth.
- Dip each cake ball into the melted white chocolate, allowing excess to drip off.
- Insert a lollipop stick into the center of each cake ball before the chocolate sets.
- Drizzle red gel food coloring onto the candy eyeballs and place them on top of each cake pop.
- Drizzle black gel food coloring around the candy eyeballs for decoration.
- Allow the cake pops to set completely before wrapping with ribbons.
Notes
Choose a cake flavor you love; chocolate or vanilla works well. Substitute buttercream for cream cheese frosting if a sweeter taste is desired.