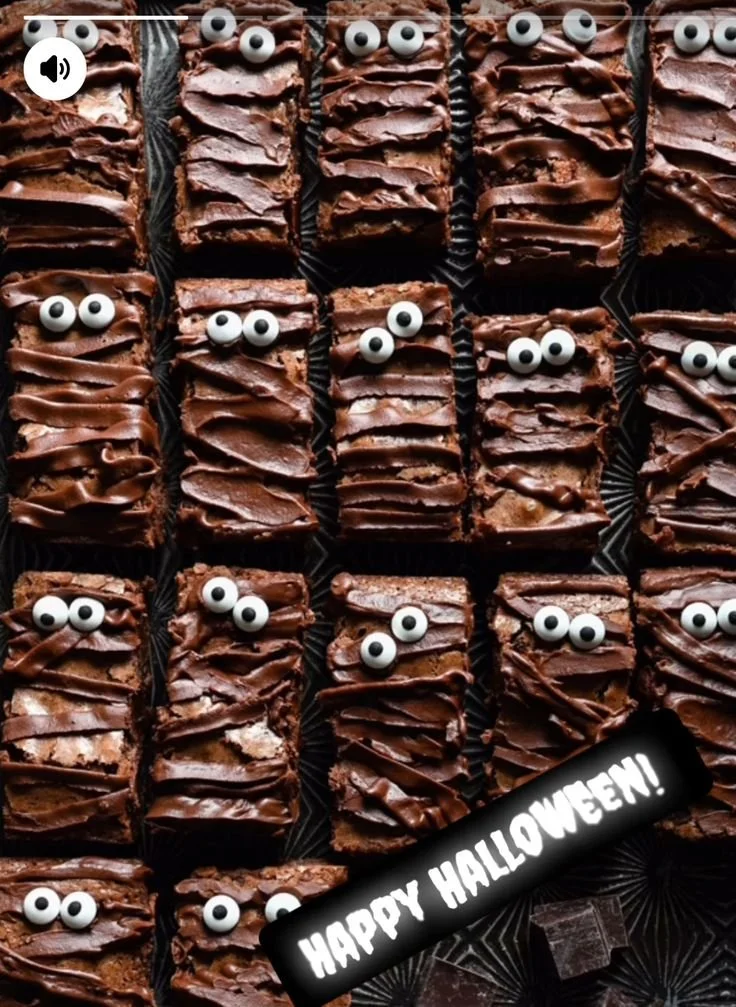
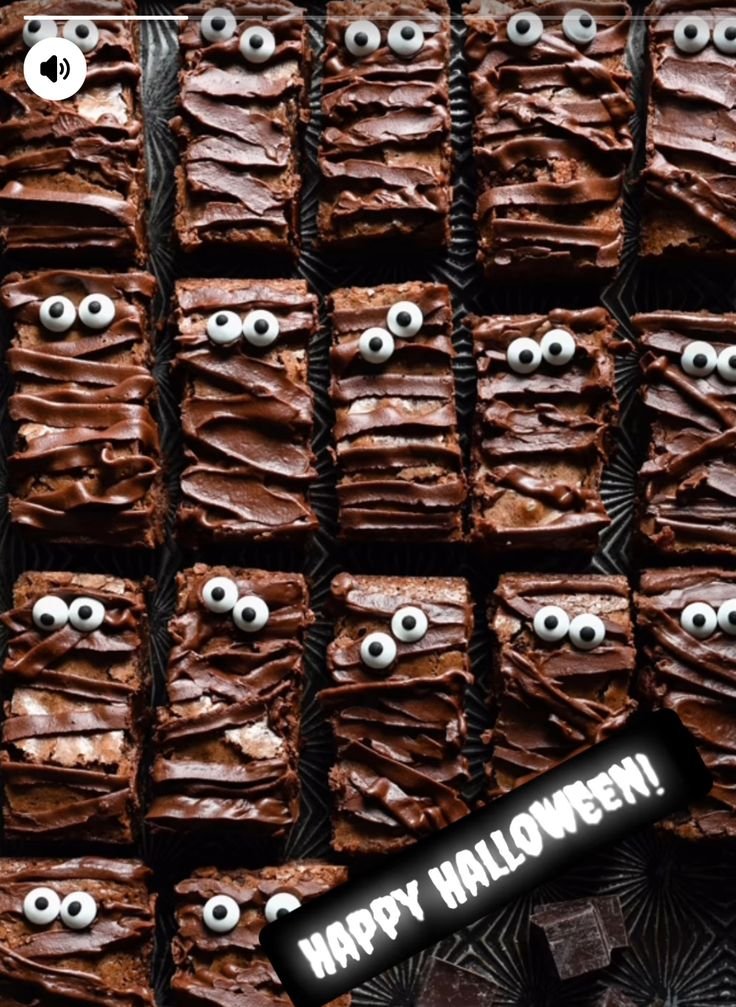
Halloween Mummy Brownies are a fun and spooky treat that will delight kids and adults alike. These easy-to-make brownies not only taste delicious but also add a festive touch to your Halloween gatherings. With their rich chocolatey flavor and playful mummy decoration, they are sure to be a hit at your Halloween party.
Why You’ll Love Halloween Mummy Brownies
- Fun and Festive: These brownies are perfect for Halloween, featuring a cute mummy design that kids will love. They make for great decorations and conversation starters at any Halloween party.
- Easy to Make: With simple ingredients and straightforward instructions, these brownies are a breeze to whip up, even for novice bakers. You’ll have delicious treats ready in no time!
- Deliciously Chocolatey: Rich, fudgy brownies serve as the perfect base for the playful mummy design, guaranteeing a satisfying chocolate experience in every bite.
- Customizable Decorations: While the mummy decoration is adorable, you can play with shapes and designs—turn them into ghosts, pumpkins, or anything Halloween-inspired!
- Great for Kids: Kids can help with the decorating, making this a fun family activity. It’s a perfect way to spend time together while creating something tasty.
Recipe Overview
- Prep Time: 20 minutes
- Cook Time: 30 minutes
- Total Time: 50 minutes
- Servings: 12 brownies
- Difficulty Level: Easy
Ingredients You’ll Need for Halloween Mummy Brownies
-
For the Brownies:
- 1 cup unsalted butter (melted; adds richness)
- 2 cups sugar (for sweetness)
- 4 large eggs (for structure)
- 1 teaspoon vanilla extract (for flavor)
- 1 cup all-purpose flour (the base)
- 1 cup unsweetened cocoa powder (for that chocolatey goodness)
- 1/2 teaspoon baking powder (for a lighter texture)
- 1/2 teaspoon salt (enhances flavor)
-
For Decoration:
- 1 cup white chocolate chips (for mummy wrap)
- Candy eyes (available at any baking supply or craft store)
How to Make Halloween Mummy Brownies
-
Prepare the Baking Pan: Preheat your oven to 350°F (175°C). Grease a 9×13 inch baking pan or line it with parchment paper for easy removal.
-
Mix the Brownie Batter: In a large mixing bowl, combine the melted butter and sugar. Stir until well blended. Add the eggs one at a time, mixing well after each addition, then add the vanilla extract.
-
Combine Dry Ingredients: In another bowl, whisk together the flour, cocoa powder, baking powder, and salt.
-
Combine Wet and Dry Ingredients: Gradually add the dry mixture to the wet mixture, stirring until just combined. Do not overmix; a few lumps are okay.
-
Bake the Brownies: Pour the brownie batter into the prepared pan, spreading it evenly. Bake for about 25-30 minutes, or until a toothpick inserted into the center comes out mostly clean. Let them cool in the pan for about 10 minutes, then transfer to a wire rack to cool completely.
-
Melt the White Chocolate: In a microwave-safe bowl, melt the white chocolate chips in 20-second intervals, stirring in between until smooth.
-
Decorate the Brownies: Once the brownies are cool, cut them into rectangles. Use a piping bag or a plastic zip-top bag with the corner snipped off to drizzle the melted white chocolate in a criss-cross pattern on each brownie to create the mummy’s bandages.
-
Add Eyes: Place two candy eyes on each brownie while the white chocolate is still wet, so they stick nicely.
Tips for Success
- Do Not Overmix: Stir the batter until ingredients are just combined to ensure fudgy brownies. Overmixing can lead to cakey brownies.
- Use Quality Cocoa Powder: A good-quality cocoa powder will enhance the flavor of your brownies. Choose one you enjoy.
- Cool Completely: Allow the brownies to cool completely before decorating to prevent the melted chocolate from melting further.
- Pipe with Care: If using a piping bag, make sure not to squeeze too much at once to create thin white chocolate strands for an authentic mummy look.
Easy Variations
- Nutty Brownies: Add chopped nuts (like walnuts or pecans) to the brownie batter before baking for added texture.
- Mint Chocolate Mummies: Mix in a few drops of mint extract into the brownie batter for a refreshing twist.
- Dairy-Free Option: Substitute butter with a dairy-free alternative, and use dairy-free chocolate chips for the decoration.
- Gluten-Free Brownies: Substitute all-purpose flour with a gluten-free flour blend to make this recipe suitable for gluten-sensitive individuals.
- Halloween Themed Shapes: Instead of cutting into squares, use Halloween cookie cutters for fun, festive shapes.
What to Serve with Halloween Mummy Brownies
- Pumpkin Spice Latte: The warm spices of pumpkin spice complement the chocolate, making it a cozy pairing for fall.
- Vanilla Ice Cream: A scoop of vanilla ice cream balances the richness of the brownies beautifully.
- Spooky Cupcakes: Serve with Halloween-themed cupcakes to create a festive dessert table.
- Fruit Salad: Fresh fruit adds a light and refreshing contrast to the rich chocolate brownies.
- Hot Cocoa: A cup of hot cocoa is always a welcome addition alongside these chocolatey treats.
Storage and Reheating
- Refrigerator Storage: Store uneaten brownies in an airtight container in the fridge for up to a week.
- Freezer Storage: Brownies can be frozen for up to 3 months. Wrap them individually in plastic wrap and place them in a freezer-safe container.
- Best Reheating Method: To reheat, microwave a brownie for about 15-20 seconds, or enjoy it cold if you prefer!
- Preserve Texture: Allow brownies to cool completely before storing to maintain their fudgy texture.
Common Mistakes to Avoid
- Baking Too Long: Keep an eye on the baking time; brownies should be slightly underbaked for the best fudgy consistency.
- Not Cooling Before Decorating: Ensure the brownies are cool; decorating while warm can cause the chocolate to melt and lose its shape.
- Ignoring Oven Temperature: Always preheat your oven to ensure even baking. An oven that’s too hot or too cool can affect the texture.
Halloween Mummy Brownies: Background & Cultural Inspiration
While brownies have roots in America, the idea of decorating them for Halloween draws on various cultural traditions of celebrating the spooky season. The mummy concept is inspired by Egyptian mythology, where mummification was a revered practice. Over time, the “mummy” has become a playful character in Halloween festivities. By transforming standard brownies into mummy-shaped treats, we blend this history with modern-day fun, creating delicious links to different cultures through food.
Frequently Asked Questions
Can I make these brownies ahead of time?
Yes, you can make the brownies a day or two ahead. Just wait until they’re completely cool before storing them in an airtight container.
What are good substitutes for white chocolate chips?
You can use vanilla candy melts or even dark chocolate chips if you prefer a stronger chocolate flavor.
How do I store leftover brownies?
Store them in an airtight container at room temperature for up to 3 days or in the refrigerator for up to 7 days.
Can I use a box brownie mix for this recipe?
Yes! You can easily substitute your favorite box brownie mix. Just follow the instructions on the box and decorate as directed.
What should I do if my brownies turn out cakey?
To avoid cakey brownies, ensure you are not overmixing the batter and do not bake them for longer than directed.
Final Thoughts
Halloween Mummy Brownies are not just about pleasing the palate; they’re a delightful way to get into the Halloween spirit. With their easy preparation, playful design, and rich flavor, they are bound to be a crowd-pleaser at any Halloween celebration. So gather your ingredients, invite the family to help out, and enjoy creating these spooky yet scrumptious treats!
PrintHalloween Mummy Brownies
Fun and spooky brownie treats decorated to look like mummies, perfect for Halloween gatherings.
- Prep Time: 20 minutes
- Cook Time: 30 minutes
- Total Time: 50 minutes
- Yield: 12 brownies
- Category: Dessert
- Method: Baking
- Cuisine: American
- Diet: Vegetarian
Ingredients
- 1 cup unsalted butter, melted
- 2 cups sugar
- 4 large eggs
- 1 teaspoon vanilla extract
- 1 cup all-purpose flour
- 1 cup unsweetened cocoa powder
- 1/2 teaspoon baking powder
- 1/2 teaspoon salt
- 1 cup white chocolate chips
- Candy eyes
Instructions
- Prepare the baking pan: Preheat your oven to 350°F (175°C). Grease a 9×13 inch baking pan or line it with parchment paper for easy removal.
- Mix the brownie batter: In a large mixing bowl, combine the melted butter and sugar. Stir until well blended. Add the eggs one at a time, mixing well after each addition, then add the vanilla extract.
- Combine the dry ingredients: In another bowl, whisk together the flour, cocoa powder, baking powder, and salt.
- Combine the wet and dry ingredients: Gradually add the dry mixture to the wet mixture, stirring until just combined. Do not overmix; a few lumps are okay.
- Bake the brownies: Pour the brownie batter into the prepared pan, spreading it evenly. Bake for about 25-30 minutes, or until a toothpick inserted into the center comes out mostly clean. Let them cool in the pan for about 10 minutes, then transfer to a wire rack to cool completely.
- Melt the white chocolate: In a microwave-safe bowl, melt the white chocolate chips in 20-second intervals, stirring in between until smooth.
- Decorate the brownies: Once the brownies are cool, cut them into rectangles. Use a piping bag or a plastic zip-top bag with the corner snipped off to drizzle the melted white chocolate in a criss-cross pattern on each brownie to create the mummy’s bandages.
- Add eyes: Place two candy eyes on each brownie while the white chocolate is still wet, so they stick nicely.
Notes
Stir the batter until combined to ensure fudgy brownies. For variations, consider adding nuts or using mint extract.