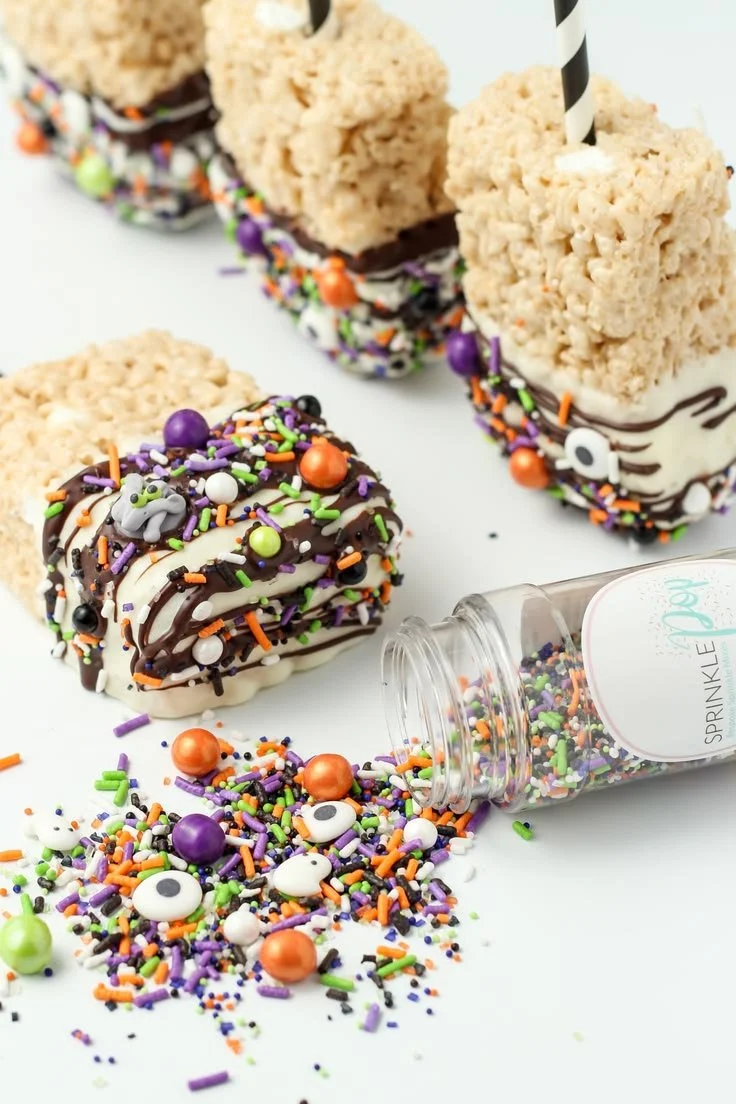
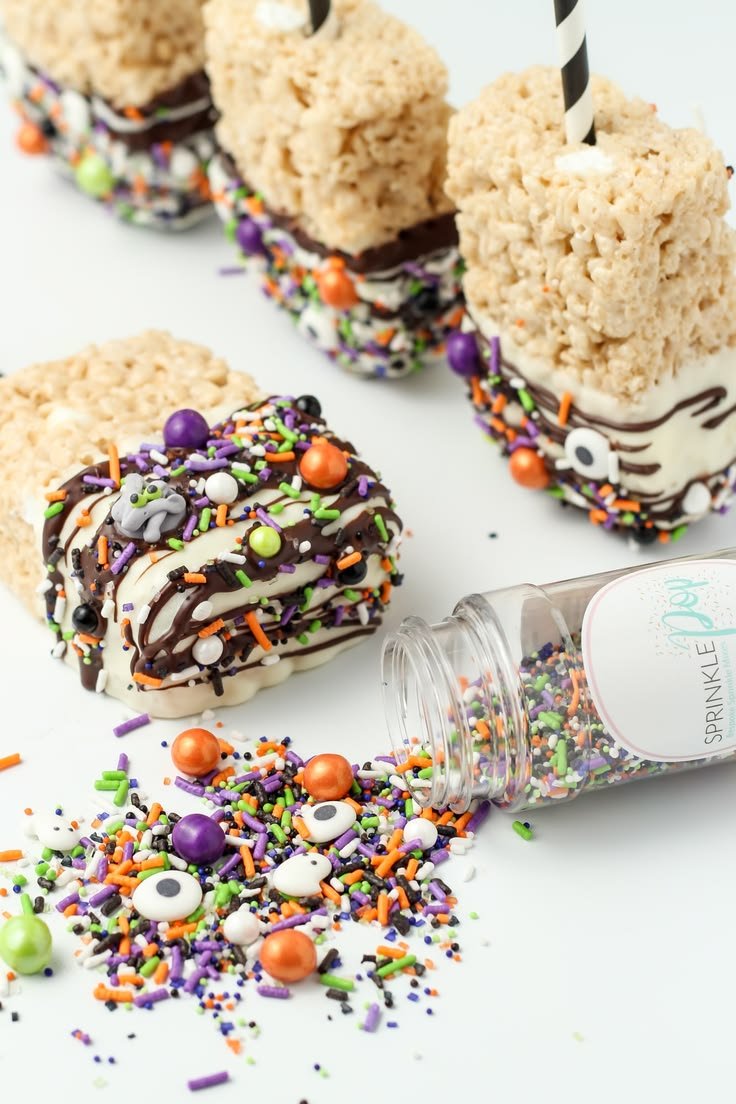
Halloween Rice Krispie Pops make for a fun and festive treat that everyone will love. These deliciously sweet, chewy pops are perfect for Halloween parties, school events, or simply enjoying at home. Plus, they’re easy to make and a hit with kids and adults alike, making this recipe a must-try for your fall festivities.
Why You’ll Love Halloween Rice Krispie Pops
- Fun to Make: Getting the family involved in shaping and decorating these pops is a great way to spend quality time together.
- Customizable Decorations: Use colorful candy melts and various sprinkles to create unique designs for each pop.
- No Baking Required: This simple recipe involves no baking, making it incredibly kid-friendly and straightforward for beginner cooks.
- Perfect for Parties: Halloween Rice Krispie Pops are visually appealing and a fantastic addition to any party table.
- Quick Treat: You can whip these up in under an hour, making them ideal for last-minute celebrations.
Recipe Overview
- Prep Time: 15 minutes
- Cook Time: 5 minutes
- Total Time: 20 minutes
- Servings: 12 pops
- Difficulty Level: Easy
Ingredients You’ll Need for Halloween Rice Krispie Pops
-
For the Rice Krispie Base:
- 3 tablespoons butter
- 1 package (10 oz) marshmallows
- 6 cups Rice Krispies cereal
-
For Decorating:
- Candy melts (orange, black, and green)
- Halloween sprinkles
- Lollipop sticks
The butter adds richness and helps the marshmallows melt evenly. If you’re looking for a vegan alternative, you can use a plant-based butter substitute. The chocolate candy melts come in a variety of colors, so feel free to use whatever matches your Halloween scheme!
How to Make Halloween Rice Krispie Pops
-
Melt the Butter: In a large pot, melt the butter over low heat. Stir occasionally to ensure it does not brown.
-
Melt Marshmallows: Add the marshmallows to the pot and stir continuously until they are completely melted and smooth. Remove from heat.
-
Combine with Cereal: Quickly stir in the Rice Krispies cereal until all the cereal is well coated with the marshmallow mixture.
-
Shape the Pops: Allow the mixture to cool slightly, then use your hands or a spatula to shape the mixture into balls or pops, pressing gently to form a compact shape.
-
Insert Sticks: While still warm, insert lollipop sticks into the shaped mixture and allow them to set completely at room temperature.
-
Melt Candy Coating: Melt the candy melts according to package instructions in a microwave-safe bowl or over a double boiler.
-
Dip and Decorate: Dip each pop into the melted candy, ensuring it’s fully coated, then immediately decorate with Halloween sprinkles.
-
Cool and Set: Place the decorated pops on a wax paper-lined baking sheet and let them cool until the candy coating has set.
Tips for Success
- Use a Non-Stick Pot: This will help prevent the marshmallow mixture from sticking to the pot and make cleaning easier.
- Keep the Mixture Warm: If the Rice Krispies start to harden while you shape them, you can place the mixture back on low heat for a few moments to soften it again.
- Don’t Over-melt the Candy: When melting candy melts, be careful not to overheat them; heat in small increments to avoid burning.
- Experiment with Textures: If you want a crunchier pop, add in some crushed nuts or pretzels.
Easy Variations
- Add Flavor: Mix in a teaspoon of vanilla extract to the melted marshmallows for an extra layer of flavor.
- Chocolate Dipped: Use chocolate candy melts for a classic chocolate flavor and coat the pops instead of colored melts.
- Ghostly Pops: Shape the pops into ghost-like figures and use black icing for eyes.
- Pumpkin Pops: Use orange candy melts and shape the pops into pumpkins by forming them into small pumpkin shapes before inserting the sticks.
What to Serve with Halloween Rice Krispie Pops
- Apple Slices: The crispness of fresh apples balances the sweetness of the pops, making for a refreshing side.
- Hot Chocolate: A warm cup of hot chocolate is the perfect drink to accompany these sweet treats, especially during chilly October evenings.
- Cheese and Crackers: A savory platter of cheese and crackers can complement the sweetness of the rice pops well.
- Halloween Punch: Serve the pops with a festive Halloween punch to add a fun element to your gathering.
Storage and Reheating
- Refrigerator Storage: Store the Rice Krispie pops in an airtight container. They can last for up to one week in the refrigerator.
- Freezer Storage: For longer storage, wrap the pops individually in plastic wrap and place them in a freezer bag. They can be stored in the freezer for up to 3 months.
- Reheating: If they harden, you can let them sit at room temperature for a few minutes before enjoying them again. Avoid reheating in the microwave as it can ruin the texture.
Common Mistakes to Avoid
- Not Coating the Cereal Enough: Make sure to thoroughly combine the Rice Krispies with the melted marshmallows to ensure each piece is well-covered.
- Overheating the Marshmallows: Be careful not to overheat the marshmallows as this can affect their texture and lead to a hard end product.
- Skipping the Cooling Step: Allowing the mixture to cool slightly before shaping is crucial for easy handling; hot mixture may be difficult to mold.
Halloween Rice Krispie Pops: Background & Cultural Inspiration
Rice Krispie treats are a classic American dessert created in the 1930s, making them a nostalgic treat for many. Over the years, they have evolved into various creative forms and seasonal adaptations. The addition of lollipop sticks and festive decorations makes these pops a popular choice for Halloween celebrations, offering a hands-on activity for families while also providing visually striking treats that can be shared at parties and gatherings.
Frequently Asked Questions
Can I make these Rice Krispie pops in advance?
Yes! You can make these pops a day or two ahead of your event. Store them in an airtight container until you’re ready to serve.
What can I substitute for marshmallows?
If you want to avoid using marshmallows, you can try using marshmallow fluff as a substitute. Adjust the quantity as necessary, as fluff tends to have a different moisture content.
Can I use different cereal?
Absolutely! While Rice Krispies are traditional, you can use any puffed cereal or even popcorn for a fun twist.
How do I store leftovers?
To store, place the pops in an airtight container and keep them at room temperature or in the refrigerator for up to one week.
What can I do if the mixture is too sticky?
If the Rice Krispie mixture is too sticky to handle, allow it to cool a bit more before shaping. If all else fails, you may want to coat your hands with a little butter or oil to manage the stickiness.
Final Thoughts
Halloween Rice Krispie Pops are not only simple to make but also a delightful treat that brings fun and creativity to your Halloween celebrations. Their versatility means you can customize them to fit your style and taste preferences, making them a fantastic choice for gatherings of any size. Whether you’re looking to impress guests or just want to whip up something special for the family, these pops are sure to be a hit. So gather your ingredients and get started on this deliciously festive adventure!
PrintHalloween Rice Krispie Pops
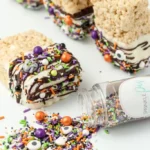
Fun and festive Rice Krispie pops perfect for Halloween parties or school events, easy to make and delightful for all ages.
- Prep Time: 15 minutes
- Cook Time: 5 minutes
- Total Time: 20 minutes
- Yield: 12 pops
- Category: Dessert
- Method: No-Bake
- Cuisine: American
- Diet: Vegetarian
Ingredients
- 3 tablespoons butter
- 1 package (10 oz) marshmallows
- 6 cups Rice Krispies cereal
- Candy melts (orange, black, and green)
- Halloween sprinkles
- Lollipop sticks
Instructions
- Melt the butter in a large pot over low heat.
- Add the marshmallows to the pot and stir continuously until melted and smooth.
- Quickly stir in the Rice Krispies until well coated.
- Allow the mixture to cool slightly, then shape into balls or pops.
- Insert lollipop sticks into the shaped mixture.
- Melt the candy melts according to package instructions.
- Dip each pop into the melted candy and decorate with sprinkles.
- Place the decorated pops on a wax paper-lined baking sheet and cool until set.
Notes
Use a non-stick pot to prevent sticking. Keep the mixture warm while shaping. Avoid overheating the candy melts.