Pita pizzas are a delightful and easy dish that makes perfect use of quick-cooking ingredients. This recipe is worth making because it’s not only simple but also customizable for everyone’s taste. With a few basic ingredients, you can create a tasty meal that pleases the whole family, making it an excellent choice for busy weeknights or casual gatherings.

Why You’ll Love Pita Pizzas
- Quick to Prepare: Pita pizzas can be ready in 20 minutes, perfect for busy evenings when you’re short on time.
- Customizable: Everyone can make their own with toppings they love, from classic pepperoni to fresh vegetables.
- Kid-Friendly: The fun and interactive nature of making these pizzas engages kids in cooking and encourages them to eat healthier.
- Perfect for Meal Prep: Make a few pita pizzas ahead of time for easy lunches or snacks throughout the week.
- Budget-Friendly: Using simple ingredients means you can make a delicious meal without breaking the bank.
Recipe Overview
- Prep Time: 5 minutes
- Cook Time: 10-12 minutes
- Total Time: 15-17 minutes
- Servings: 4
- Difficulty Level: Easy
Ingredients You’ll Need for Pita Pizzas
- Pita Bread: Use whole wheat or traditional pita bread as the base.
- Tomato Sauce: Any store-bought or homemade marinara works well for your sauce layer.
- Shredded Cheese: Mozzarella is the classic choice, but feel free to mix it with cheddar or provolone for added flavor.
- Pepperoni: Use traditional or turkey pepperoni, or skip the meat for a vegetarian option.
- Toppings of Choice: Add vegetables like bell peppers, onions, mushrooms, or olives. Fresh herbs like basil or oregano work well, too.
How to Make Pita Pizzas
-
Preheat the Oven
Set your oven to 400°F (200°C) so it’s nice and hot for baking. -
Prepare the Pita Bread
Arrange the pita bread on a baking sheet. You can line it with parchment paper for easy cleanup. -
Add Tomato Sauce
Spread a layer of tomato sauce on each pita, covering it evenly but leaving a little border for the crust. -
Sprinkle Cheese
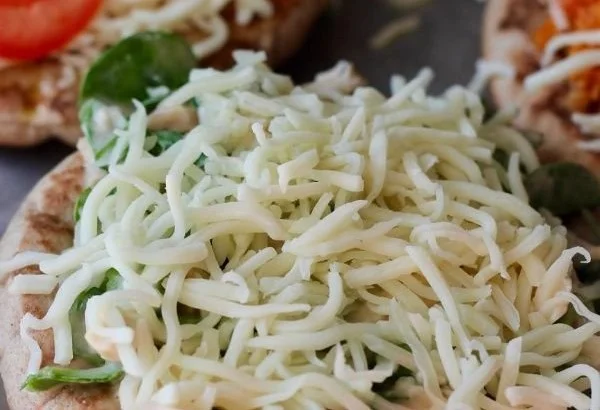
Generously sprinkle shredded cheese over the sauce, ensuring maximum meltiness. -
Layer on Pepperoni
Add pepperoni slices on top, distributing them evenly for a delicious bite. -
Add Extra Toppings
Feel free to pile on any additional toppings like sliced olives or fresh veggies at this stage. -
Bake Until Bubbly
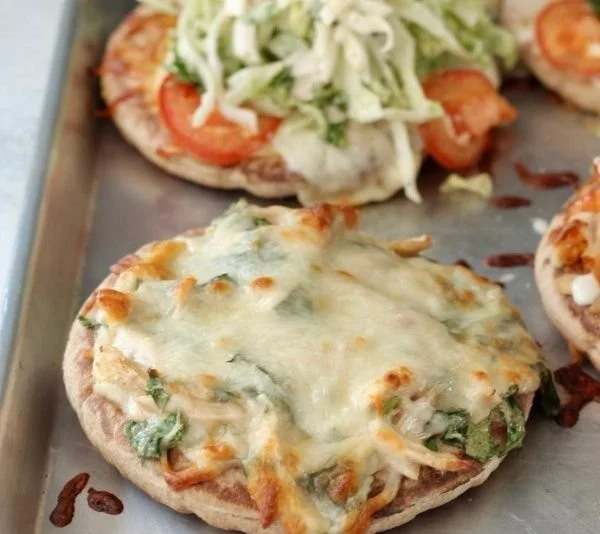
Place the baking sheet in the oven and bake for 10-12 minutes or until the cheese is bubbly and golden and the pita is slightly crisp. -
Slice and Serve
Once cooked, remove from the oven and let cool slightly. Slice into wedges and enjoy!
Tips for Success
- Choose the Right Pita: Try to select thicker pita breads as they hold toppings better.
- Don’t Overload on Toppings: A thick layer may prevent the pita from cooking properly and can result in soggy crust.
- Check for Doneness: Keep an eye on the pizzas in the oven to prevent burning; the edges should be golden brown.
- Experiment with Sauces: For a twist, try pesto or BBQ sauce instead of traditional tomato sauce.
- Add Fresh Ingredients After Baking: If using fresh herbs or delicate greens, consider adding them after baking for a fresher taste.
Easy Variations
- BBQ Chicken Pita: Use shredded rotisserie chicken and BBQ sauce topped with red onions and cilantro.
- Vegetarian Delight: Swap pepperoni for a mix of bell peppers, spinach, and artichokes for a veggie-packed option.
- Spicy Southwest: Add sliced jalapeños and pepper jack cheese for a spicy kick.
- Caprese Pita: Use fresh mozzarella, sliced tomatoes, and basil, drizzled with balsamic glaze post-baking.
- Breakfast Pita Pizza: Top with scrambled eggs, cheese, and cooked sausage for a breakfast twist.
What to Serve with Pita Pizzas
- Salad: A fresh green salad with a light vinaigrette complements the flavors and adds a healthy touch.
- Vegetable Sticks: Carrot, celery, or cucumber sticks with ranch dip make for a crunchy, refreshing snack.
- Garlic Bread: Simple garlic bread pairs excellently for those who want extra carbs.
- Soup: A side of tomato or minestrone soup can turn your quick meal into a comforting feast.
- Fruit Salad: Fresh fruit adds a sweet contrast and rounds out the meal nicely.
Storage and Reheating
- Refrigerator Storage: Store leftover pita pizzas in an airtight container in the refrigerator for up to 3 days.
- Freezer Storage: You can also freeze individual pieces by wrapping them tightly in plastic wrap and placing them in a freezer-safe bag for up to 2 months.
- Best Reheating Method: For optimal texture, reheat in the oven at 350°F (175°C) for about 10 minutes until warmed through.
- Meal Prep Note: Assemble pita pizzas without baking and refrigerate them for up to a day before baking.
Common Mistakes to Avoid
- Using Too Much Sauce: Over-saucing can lead to soggy pizzas; keep the sauce layer thin.
- Skipping Preheating: Not preheating the oven can result in uneven cooking.
- Choosing Thin Pita Bread: This could make the pizzas more difficult to handle and could fall apart.
- Not Watching the Ovens: Ovens vary; stay close during the last few minutes to avoid burning.
- Cutting Too Soon: Allow pizzas to cool slightly before cutting to maintain shape and prevent cheese from sliding off.
Pita Pizzas: Background & Cultural Inspiration
Pita pizzas are a fun twist on traditional pizza, leveraging the Middle Eastern staple of pita bread. This dish exemplifies how versatile bread can be, as it adapts well to various toppings and flavors. Historically, pita bread is a symbol of Mediterranean culture, embracing local ingredients and culinary traditions. Pita pizzas meld the convenience of fast food with the freshness of homemade meals, making it a favorite for family gatherings and casual dining.
Frequently Asked Questions
Can I use a different type of bread?
Yes! You can use any flatbread or even English muffins as a base for your pizza.
How do I make these gluten-free?
You can use gluten-free pita bread or flatbreads as a substitute.
Can I make this ahead of time?
Yes! Assemble the pita pizzas but don’t bake them until you’re ready to eat, keeping them in the refrigerator.
How do I store leftover pizzas?
Wrap them in plastic wrap or place them in an airtight container in the refrigerator to keep them fresh.
Can I adjust the spice level?
Absolutely! Add crushed red pepper flakes or spicy toppings if you enjoy a little heat.
Final Thoughts
Making pita pizzas is a delightful way to enjoy a meal that caters to everyone’s tastes. Not only are they quick and easy, but they also provide endless customization options, making it unlikely that anyone will leave the table unsatisfied. So gather your favorite toppings, and get ready to whip up these tasty treats that the whole family will love.
[wprm-recipe id=”cURL error 28: Operation timed out after 30001 milliseconds with 0 bytes received (see https://curl.haxx.se/libcurl/c/libcurl-errors.html) for https://dishdashkitchen.com/wp-json/contai/v1/wprm_recipe”]